Learn how to draw leaves. Step-by-step guide to draw three easy fall leaf drawings - simple curved leaf, squigly edge oak leaf and jagged maple leaf.
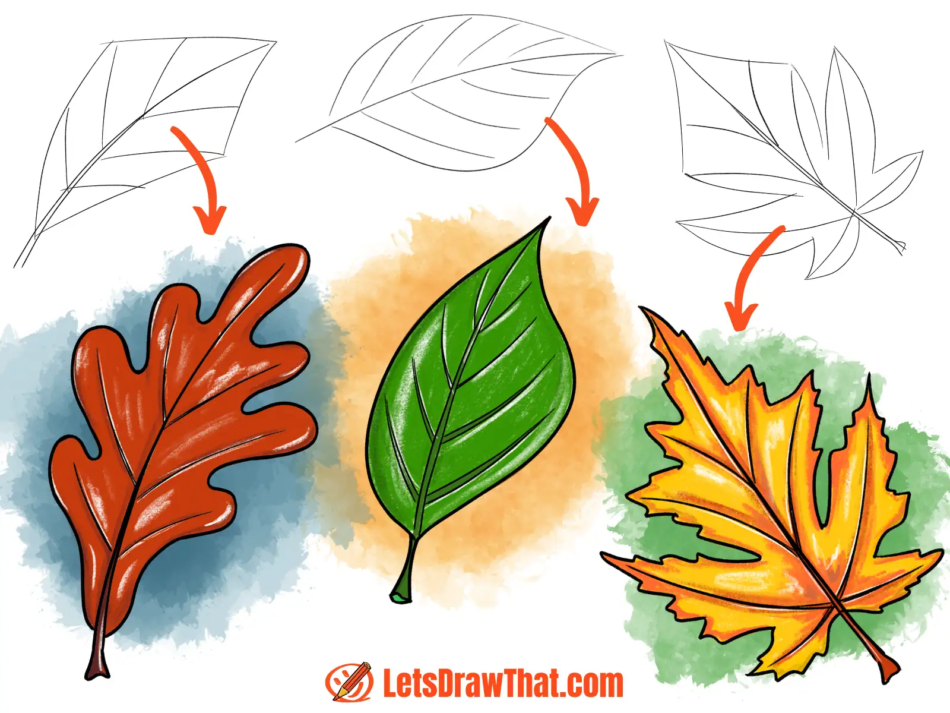
Today, we will learn how to draw leaves. We will show you step-by-step instructions on how to draw three different leaf drawings. We start with an easy leaf drawing with the leaf blade drawn in just two curved lines.
The second leaf is drawn out of kite shape base. Once we add some squiggly line edges, it turns out to be an oak leaf drawing.
The third leaf combines multiple simple leaf shapes with the kite-shaped top. Once we trace it with some jagged lines, it turns out to be an awesome maple leaf drawing.
And since it is fun playing with colors, we will color each leaf with different autumn colors for a bright color matching three fall leaf drawings.
So let’s get your pencils ready and learn how to draw leaves!
min
You will need: pencil, fineliner pen, colored pencils, eraser and drawing paper or sketchbook
Disclaimer: LetsDrawThat.com participates in the Amazon Associates Program. If you purchase a product using a link on our website, we earn a small commission, at no extra cost to you. This is one way how you can support this website.

How to draw leaves: an easy leaf drawing

Our how to draw leaves tutorial starts with an easy leaf drawing. It is just a very basic leaf shape made from two simple curves.
It is a perfect starter leaf drawing to build your confidence before diving into the more complex leaf shapes.
An easy leaf drawing: base sketch step by step
Step 1: Sketch the simple leaf outline
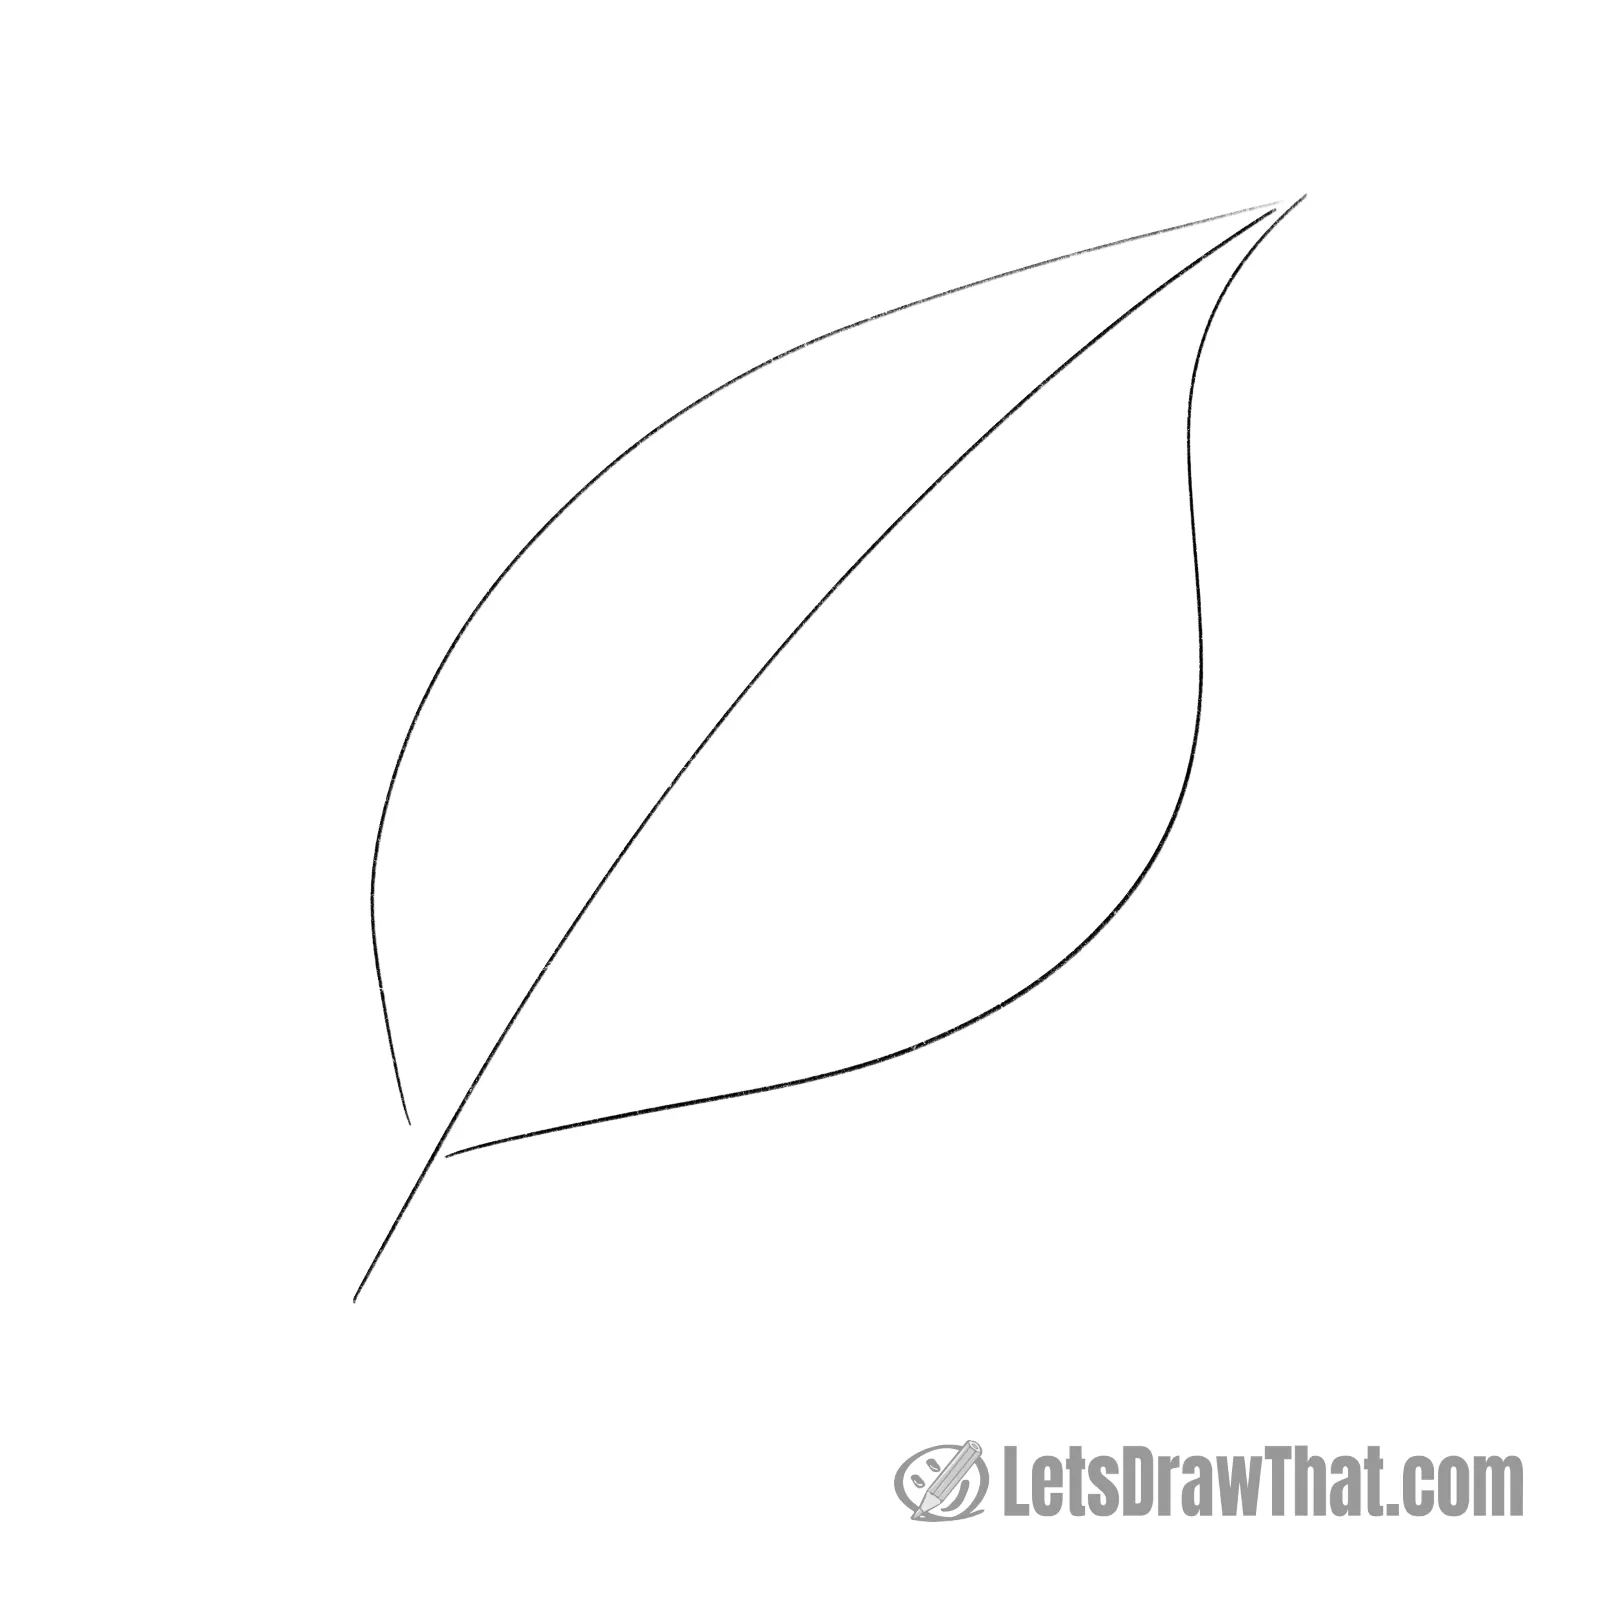
Indeed, our first leaf drawing is as simple as it gets.
Draw a slightly curved centreline first. Then, add the “S” curved right-hand side. Finish the leaf outline with the “C” curved line on the left.
There are many different leaves with this simple shape, so if yours ends up looking slightly different from what we have drawn, that is fine, too.
Step 2: Add the leaf ribs
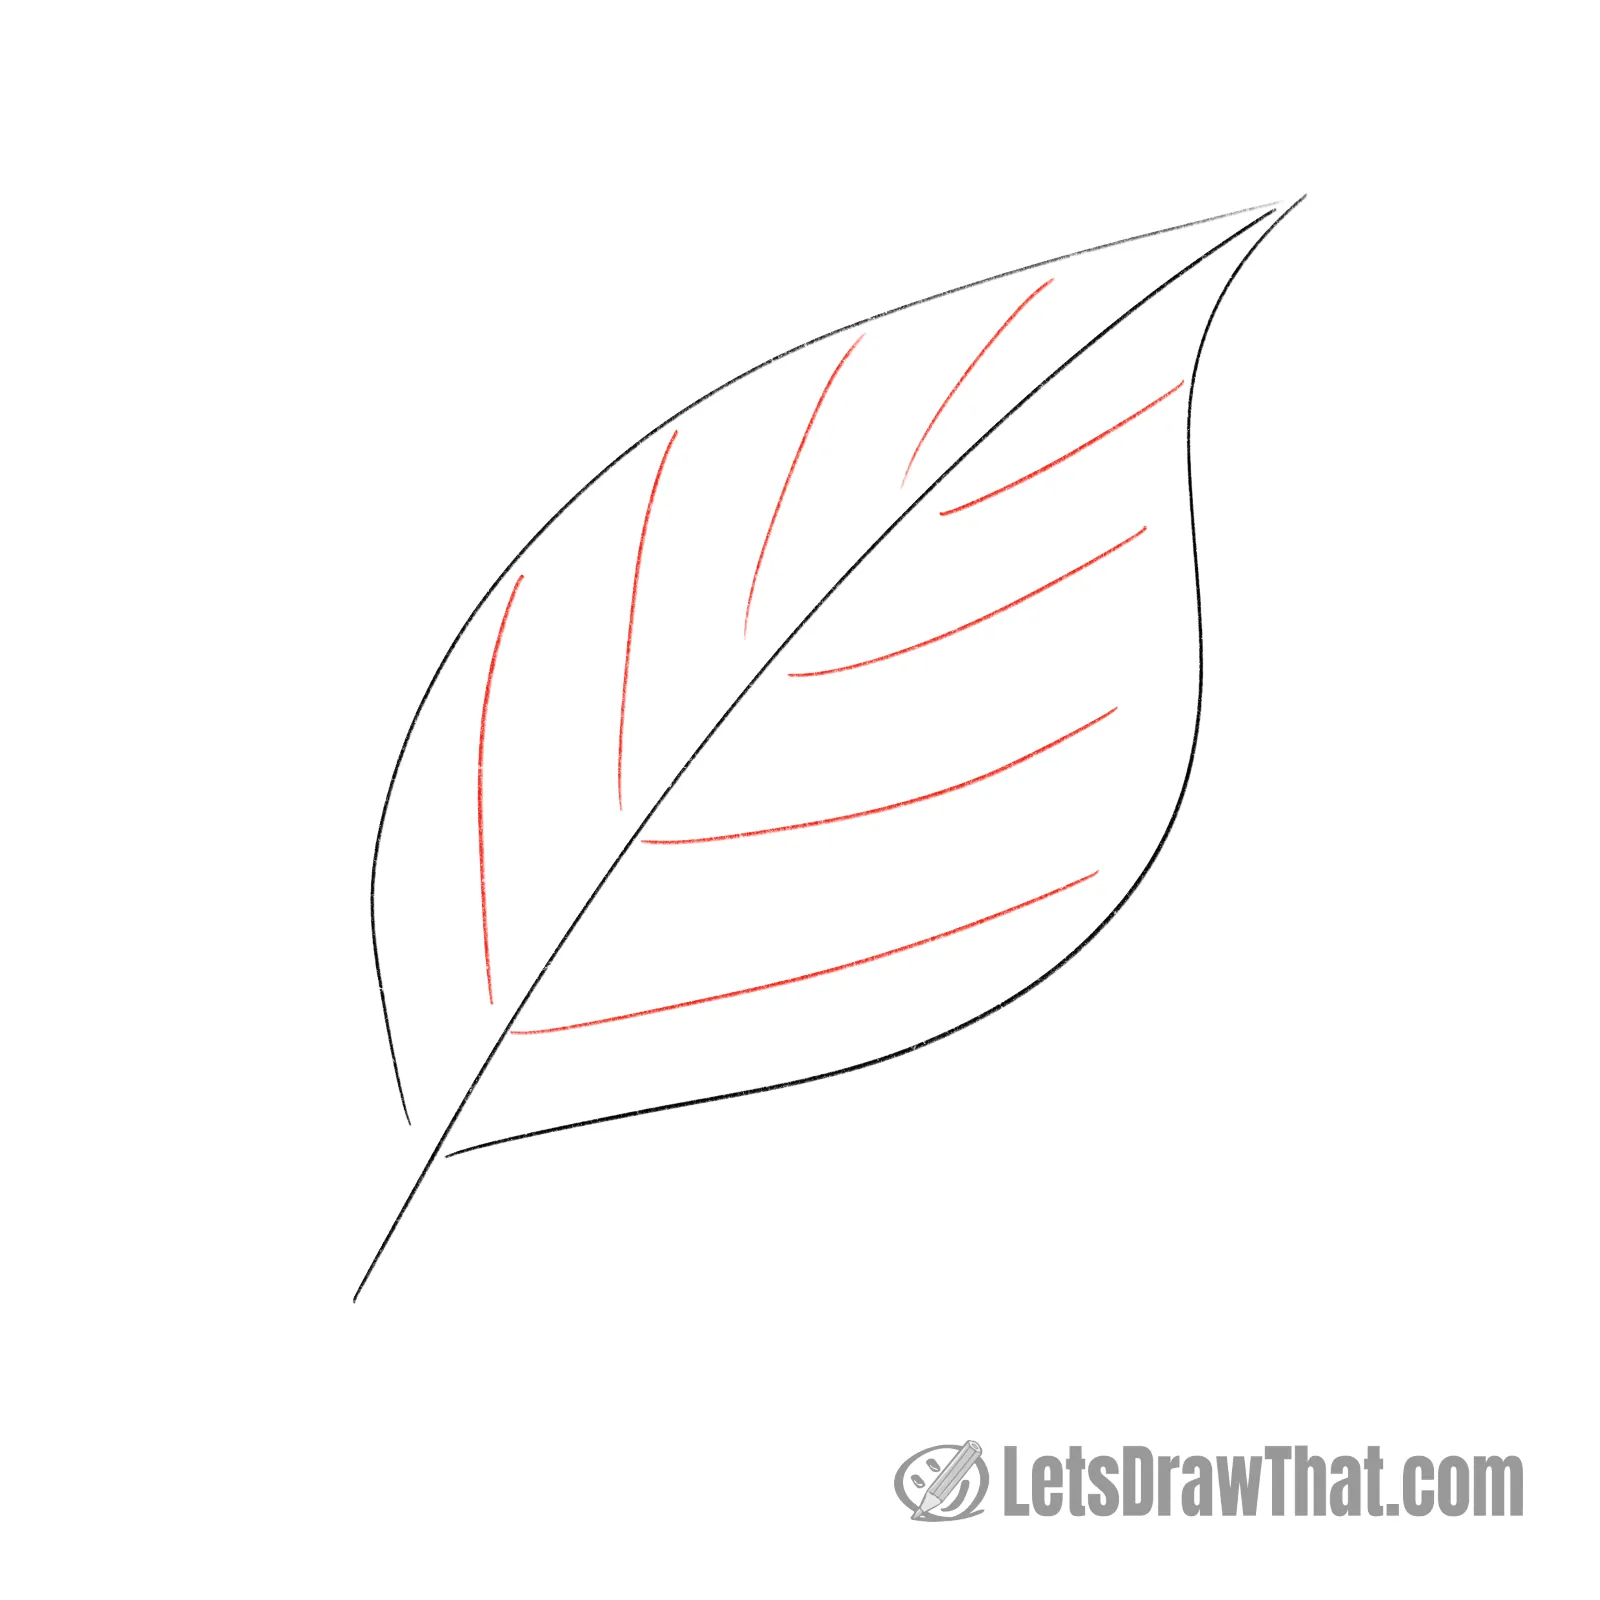
To finish the leaf sketch, draw the leaf veins on each side next.
These are just slightly curved lines that go in pairs from the centreline up. Try to space them roughly the same distance apart.
That is it – you pretty much know how to draw a leaf. Next, let’s improve on the simple sketch a bit.
An easy leaf drawing: outline the drawing step by step
Step 1: Draw the simple leaf outer edge

Let’s start outlining the leaf.
This step is easy – simply trace the sketched-out edge of your leaf.
Here is also your chance to improve or adjust the shape if you wish.
Step 2: Draw the leaf midrib and veins
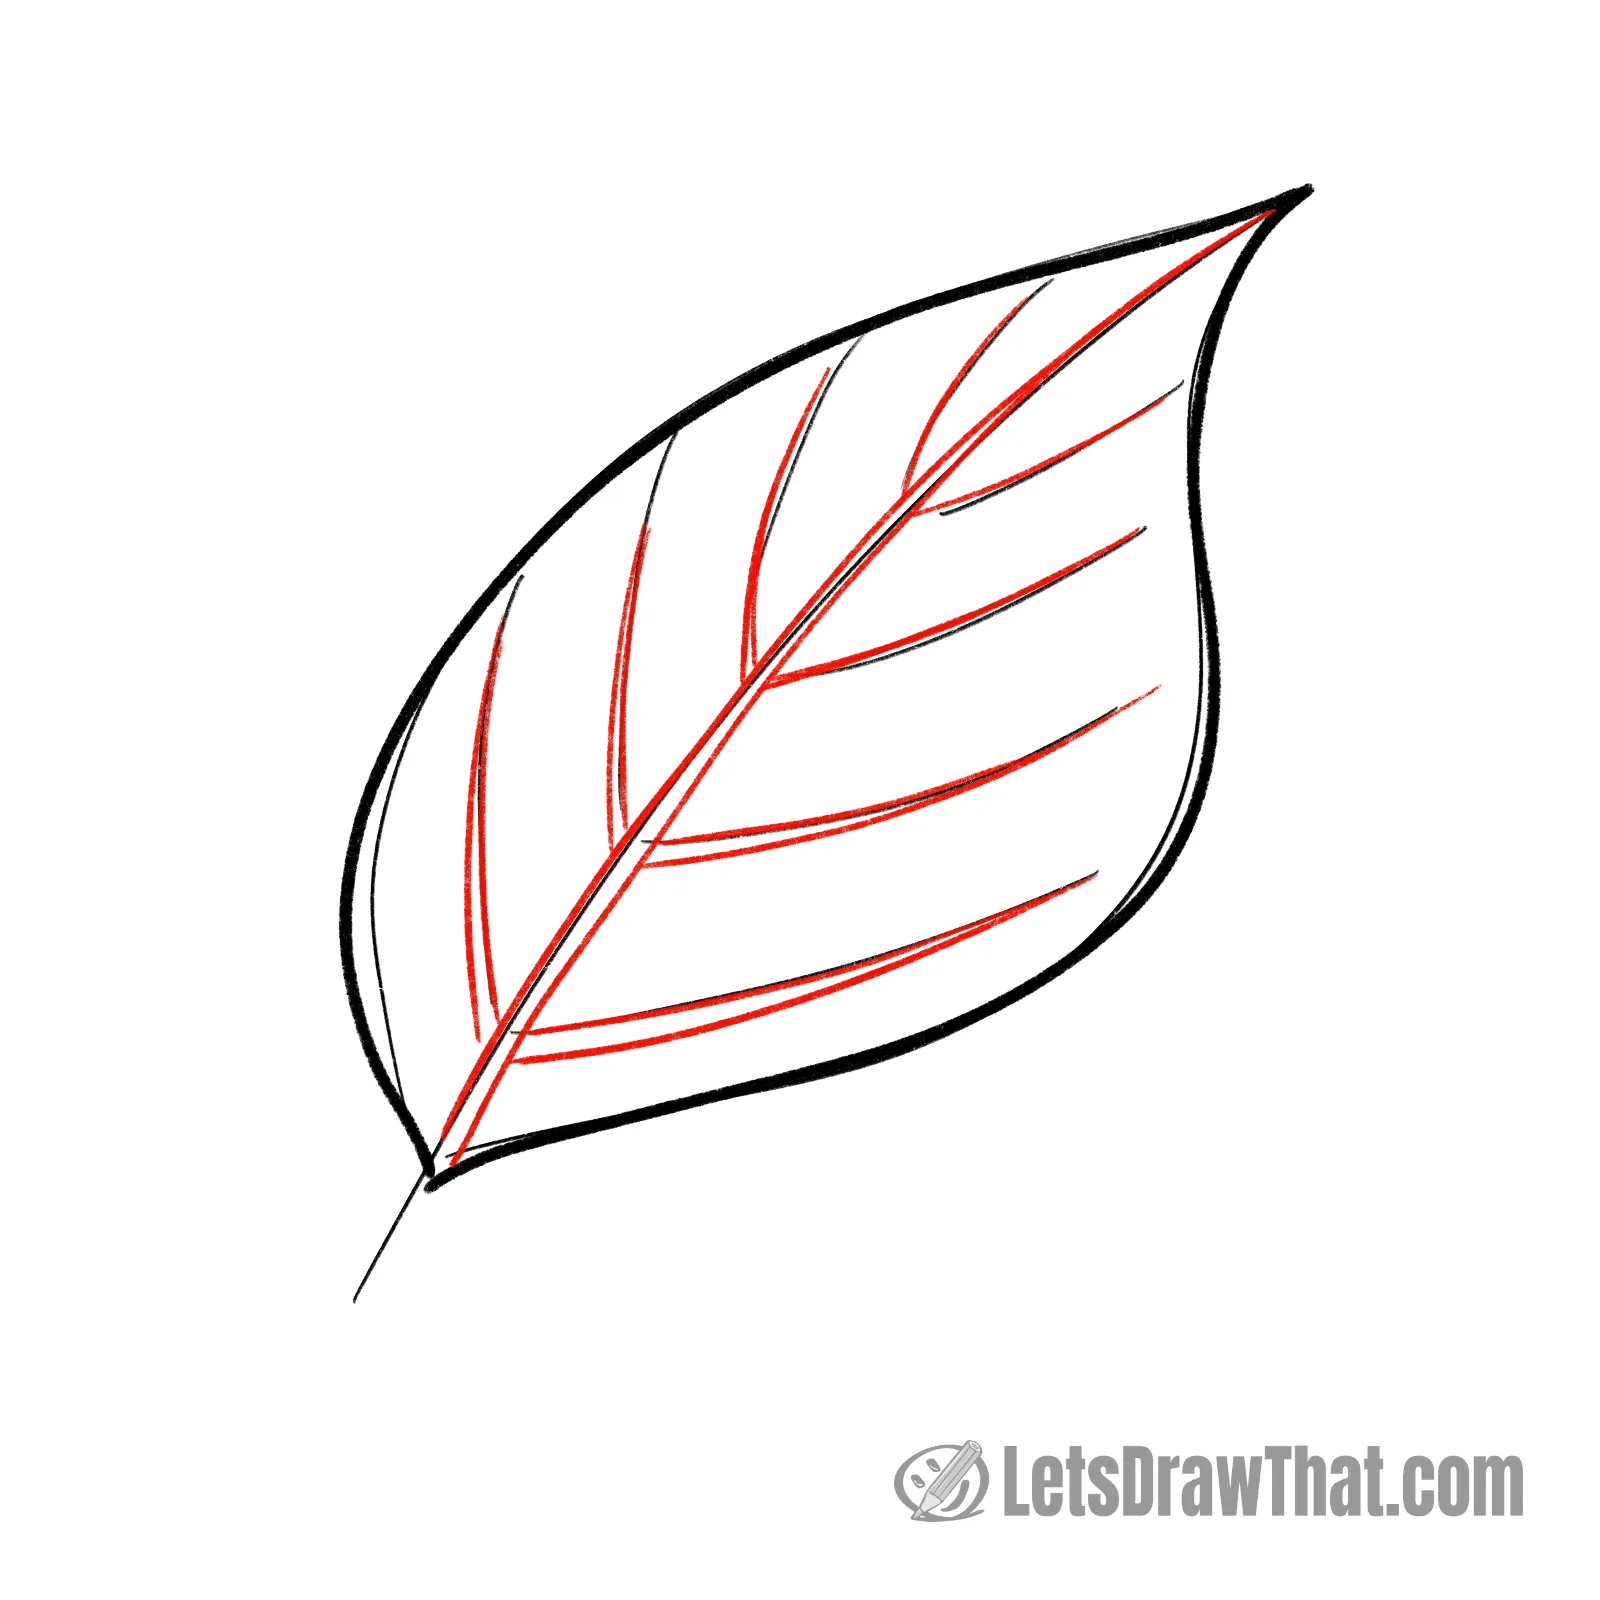
Here is our first improvement on the simple sketch. Let’s double up the ribs in the leaf.
Outline the midrib and the side veins with two lines instead of just one. If you have different pens, use a slightly thinner one.
The lines start slightly apart at the bottom and join in a single line at the top. But a single line will also do if you want to keep the drawing simple and beginner-friendly.
Step 3: Draw the leaf stalk
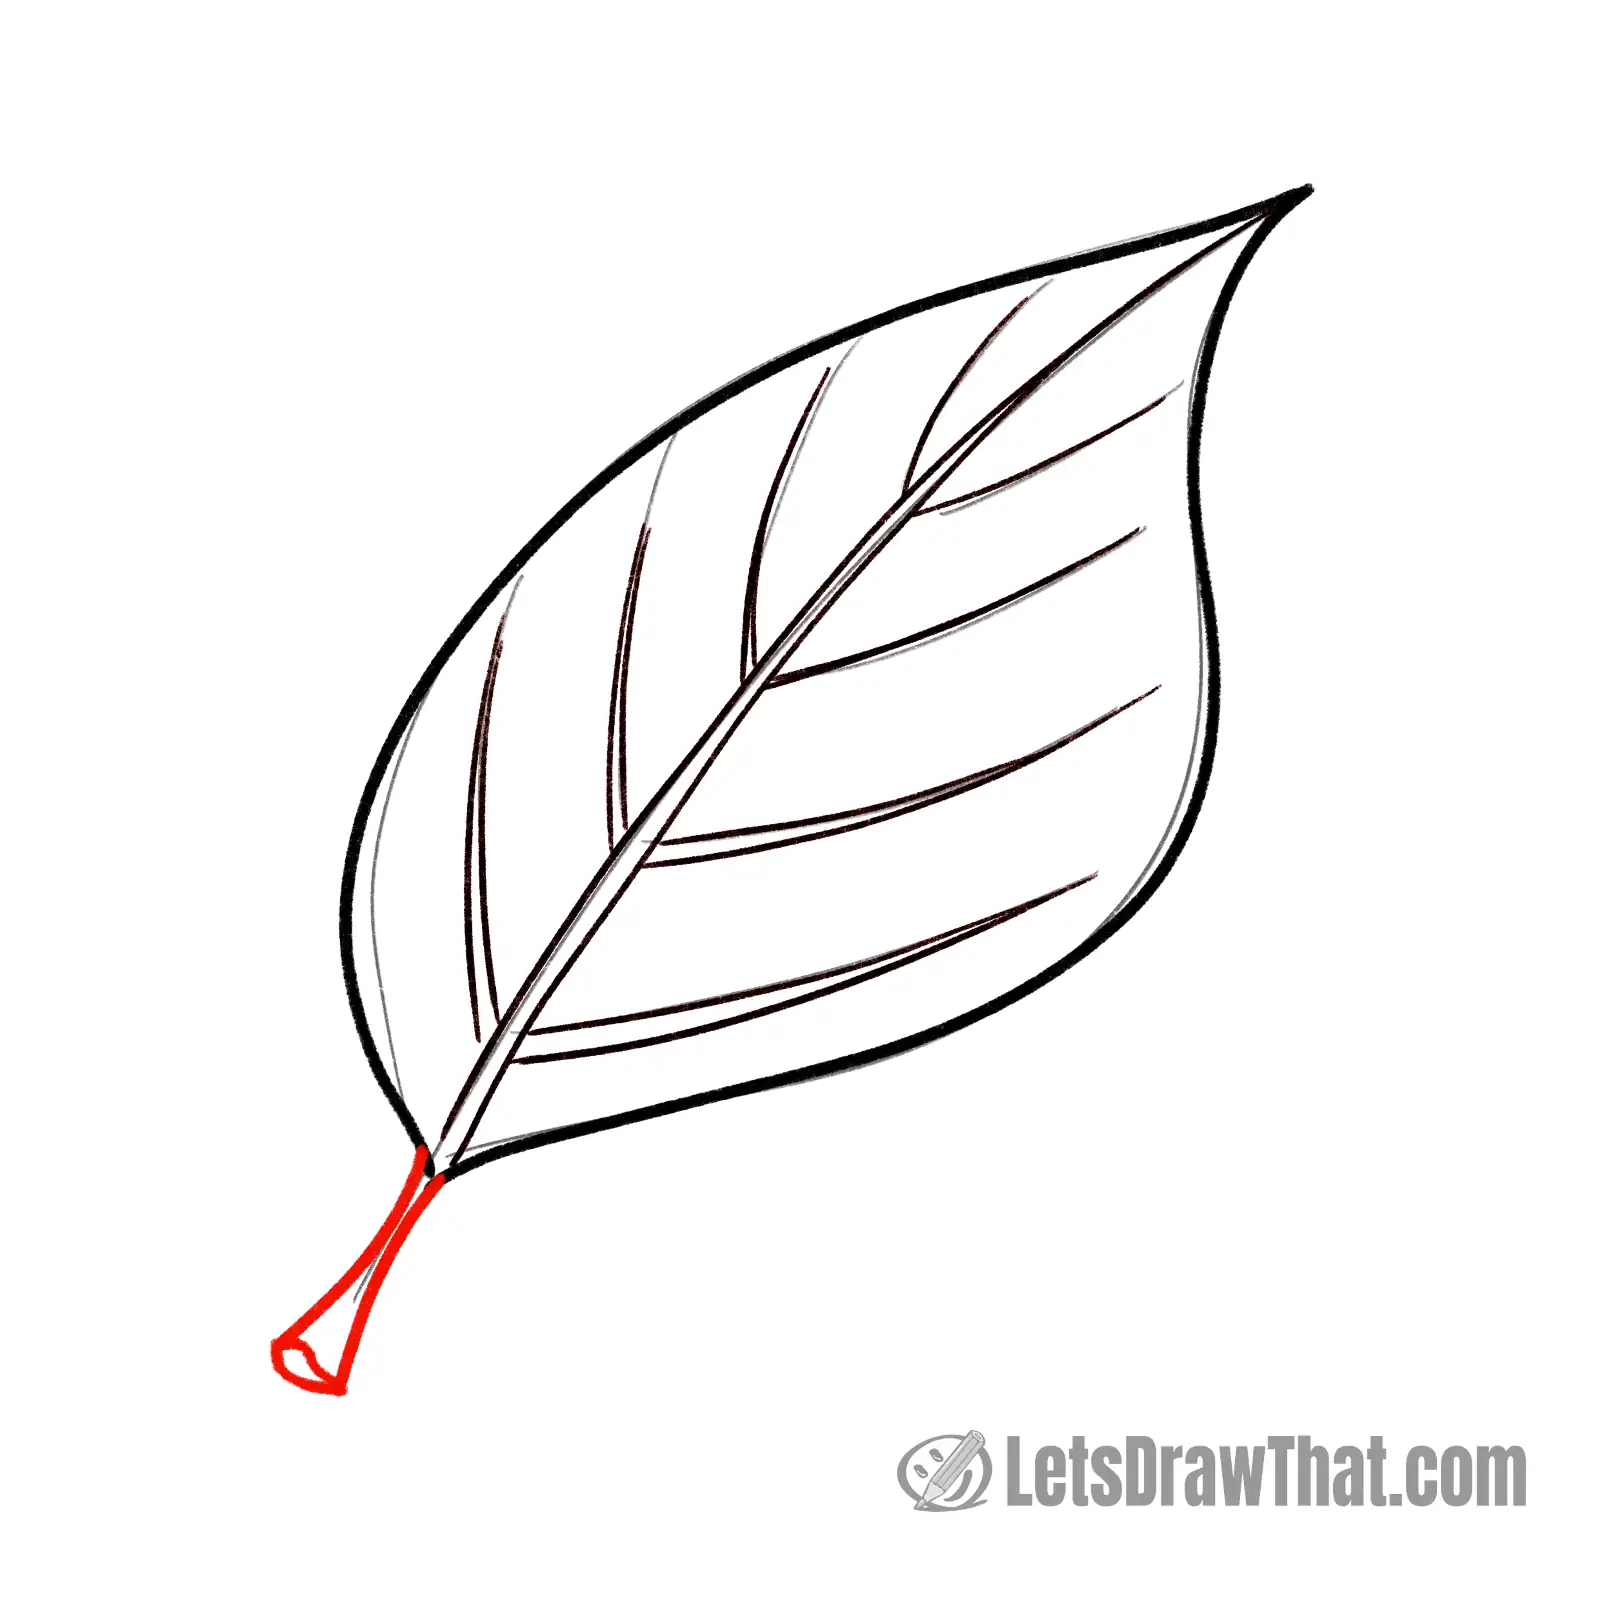
A final detail and an improvement on the sketch is to draw a nice leaf stalk.
Draw the small oval at the end first. If you want to go fancy, make the bottom line “C” curved and the top line “S” curved like we did, for a more realistic look.
The stalk then is again just two curved lines, starting from the leaf end, widening out to meet the end oval at the outermost corners.
Try your hand drawing more leaves:
How to Draw Holly for Christmas
Learn how to draw holly. An easy and quick step-by-step tutorial to draw holly leaves and berries as a decoration for your Christmas cards.An easy leaf drawing: finished drawing
An easy leaf drawing outline
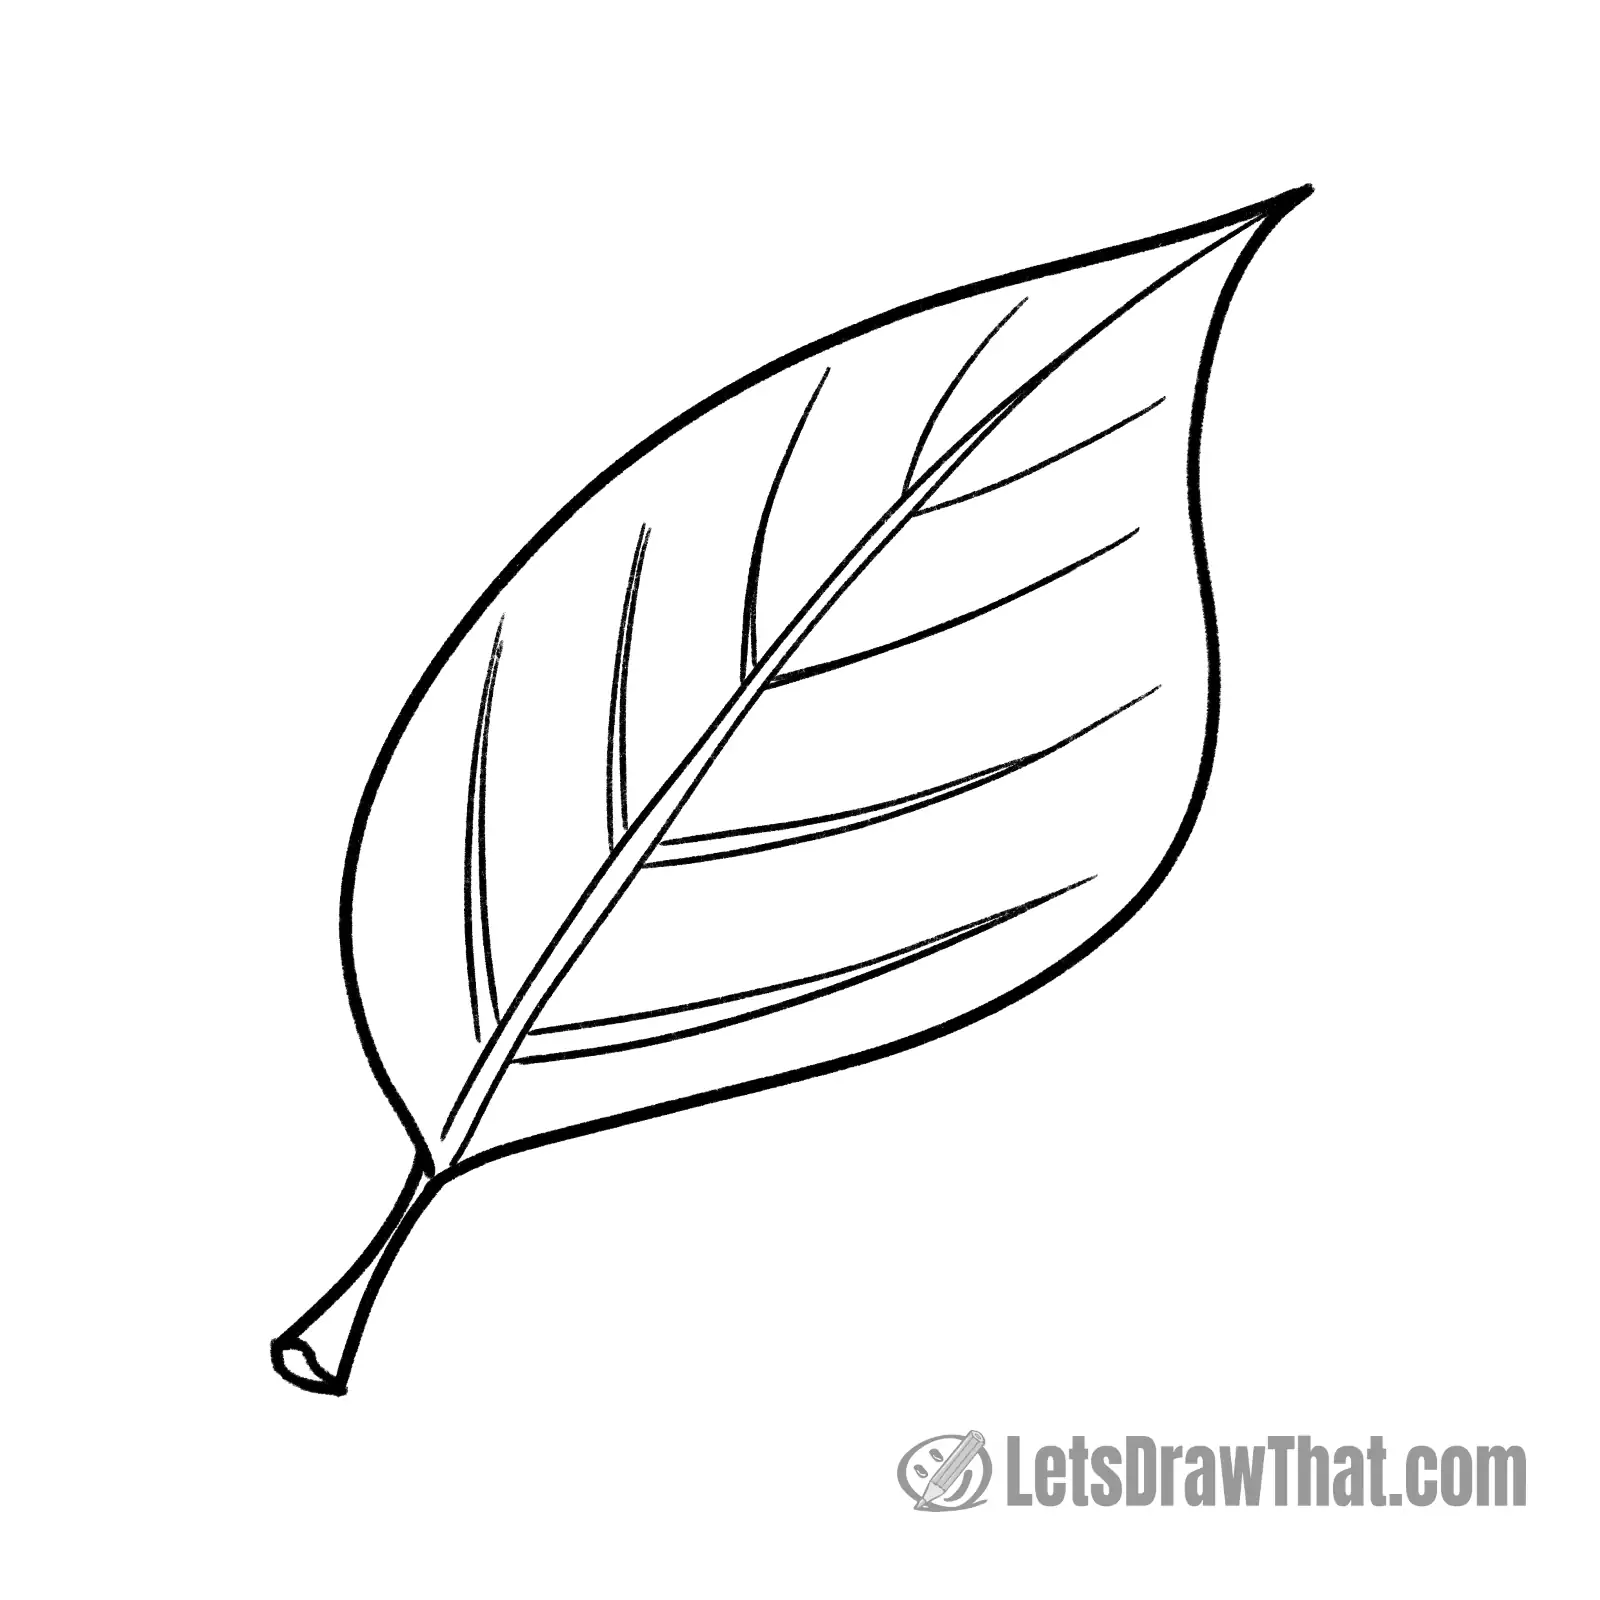
Here is the completed easy leaf drawing outline after we have erased the sketch lines.
While this is a very easy leaf drawing, it still looks great. It gives us a base to play with more complicated leaf shapes next.
An easy leaf drawing colored-in
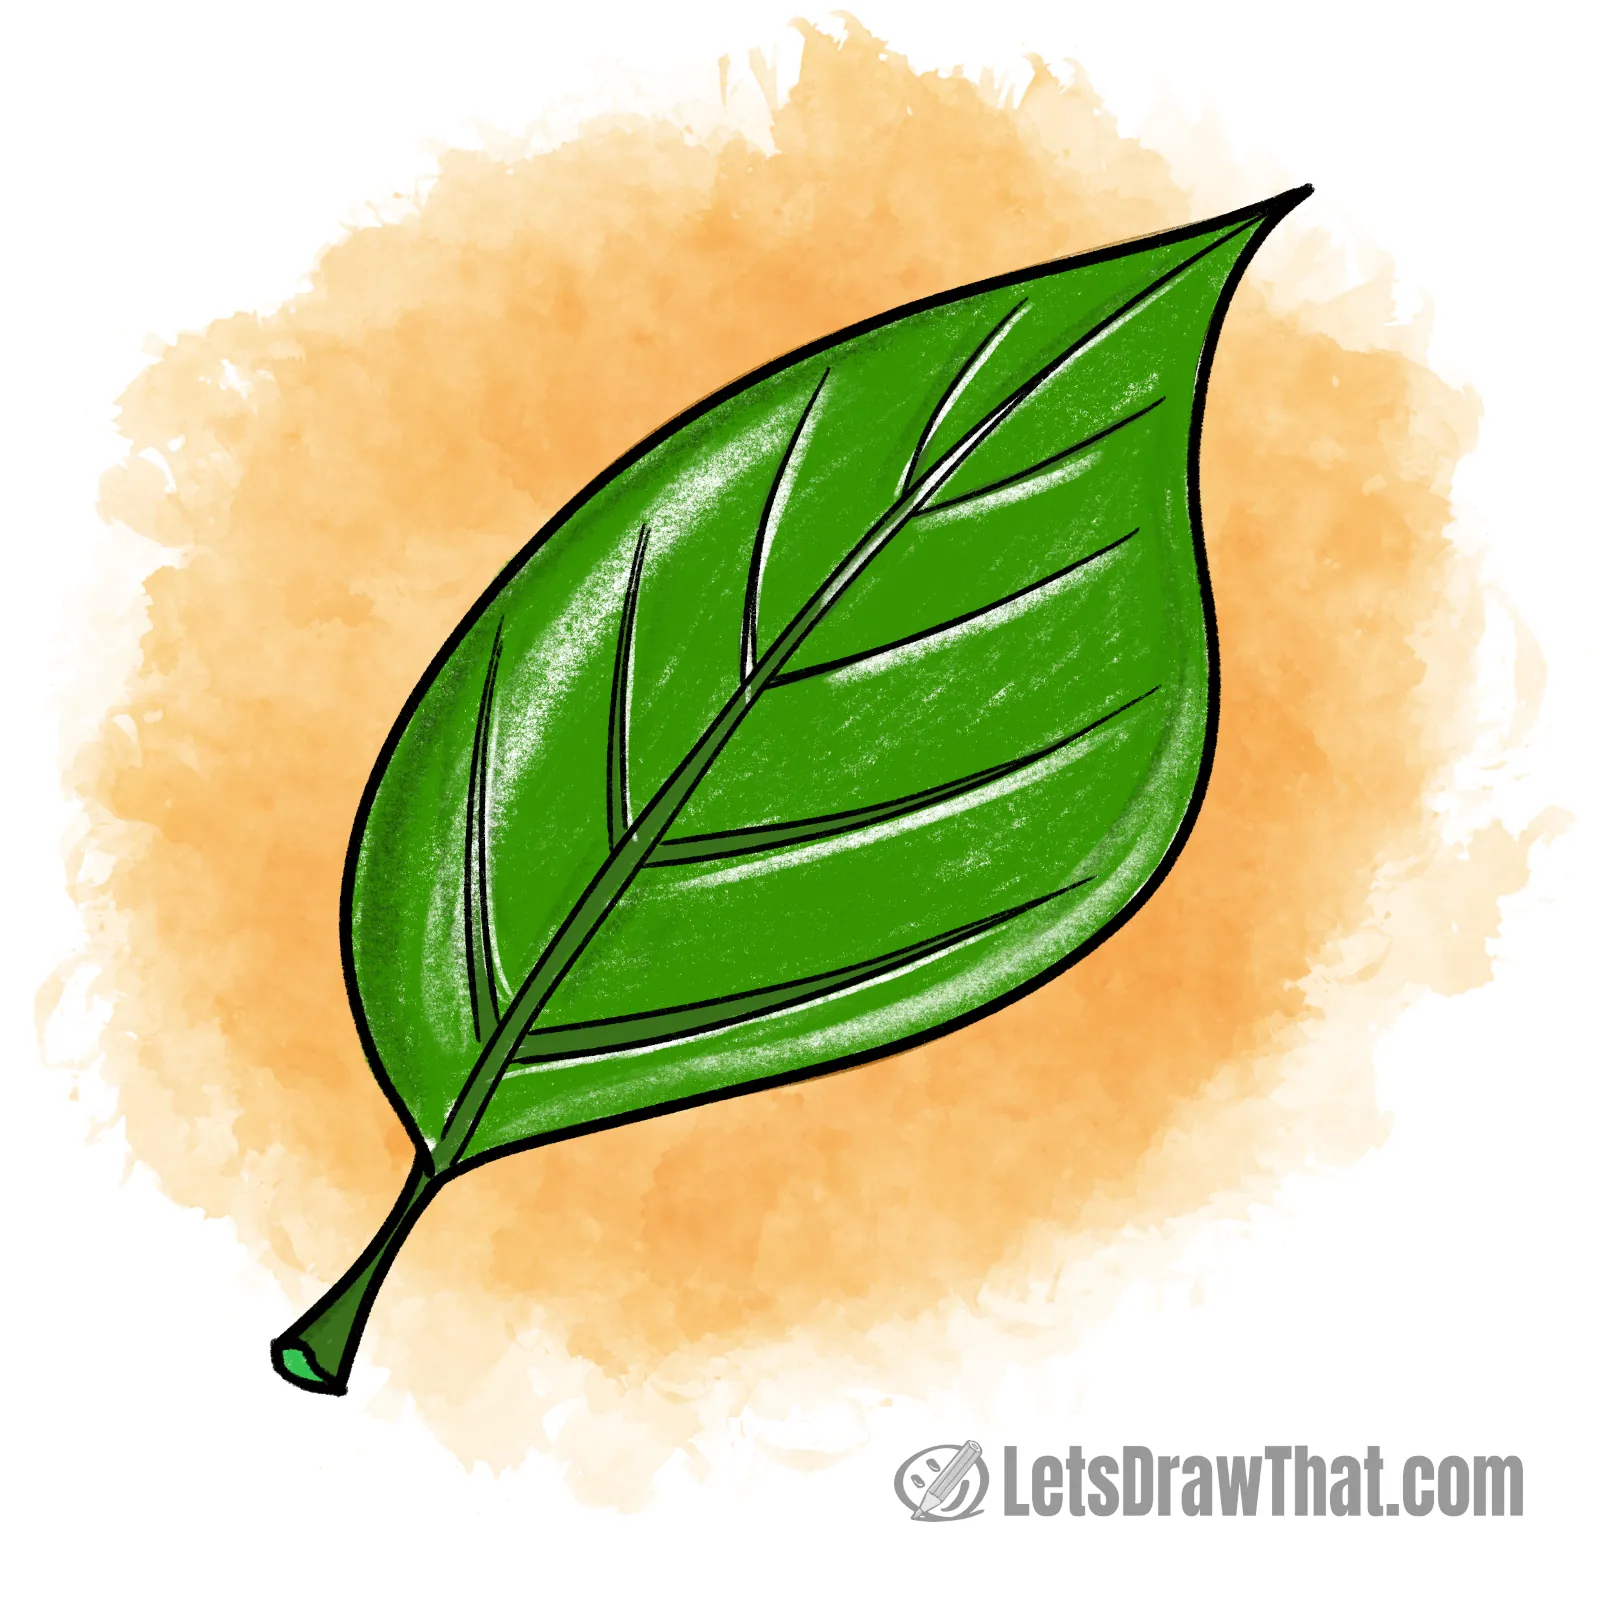
The final step is to color in our easy leaf drawing. Here, we are keeping it simple to match the simple shape. The whole leaf is nice green – that’s it.
Want to add some contrast and volume to make your leaf stand out more? Then, notice how we have colored the midrib, veins, and stalk slightly darker green. We have also added some darker green shading along the leaf edges.
As importantly, we have left out some highlights when coloring the leaf along the edges of veins and on the side of the leaf blade.
The yellow background is there just to finish off and add some contrast to our easy leaf drawing.
How to draw leaves: an oak fall leaf drawing
The second leaf in our “how to draw leaves” tutorial has just a touch more sophisticated shape. We will draw a simple outline to help us draw the squiggly edges. This one turned out to be an oak leaf drawing.
Fun fact: did you know that an oak is never without its leaves? The old fall leaves stay on the tree until springtime and only fall off when new spring leaves start growing – something called “marcescence“.
For some variety, we have colored this oak leaf a burnt orange-brown, which makes it a fall leaf drawing.
Oak fall leaf drawing: base sketch step by step
Step 1: Sketch the leaf's base shape
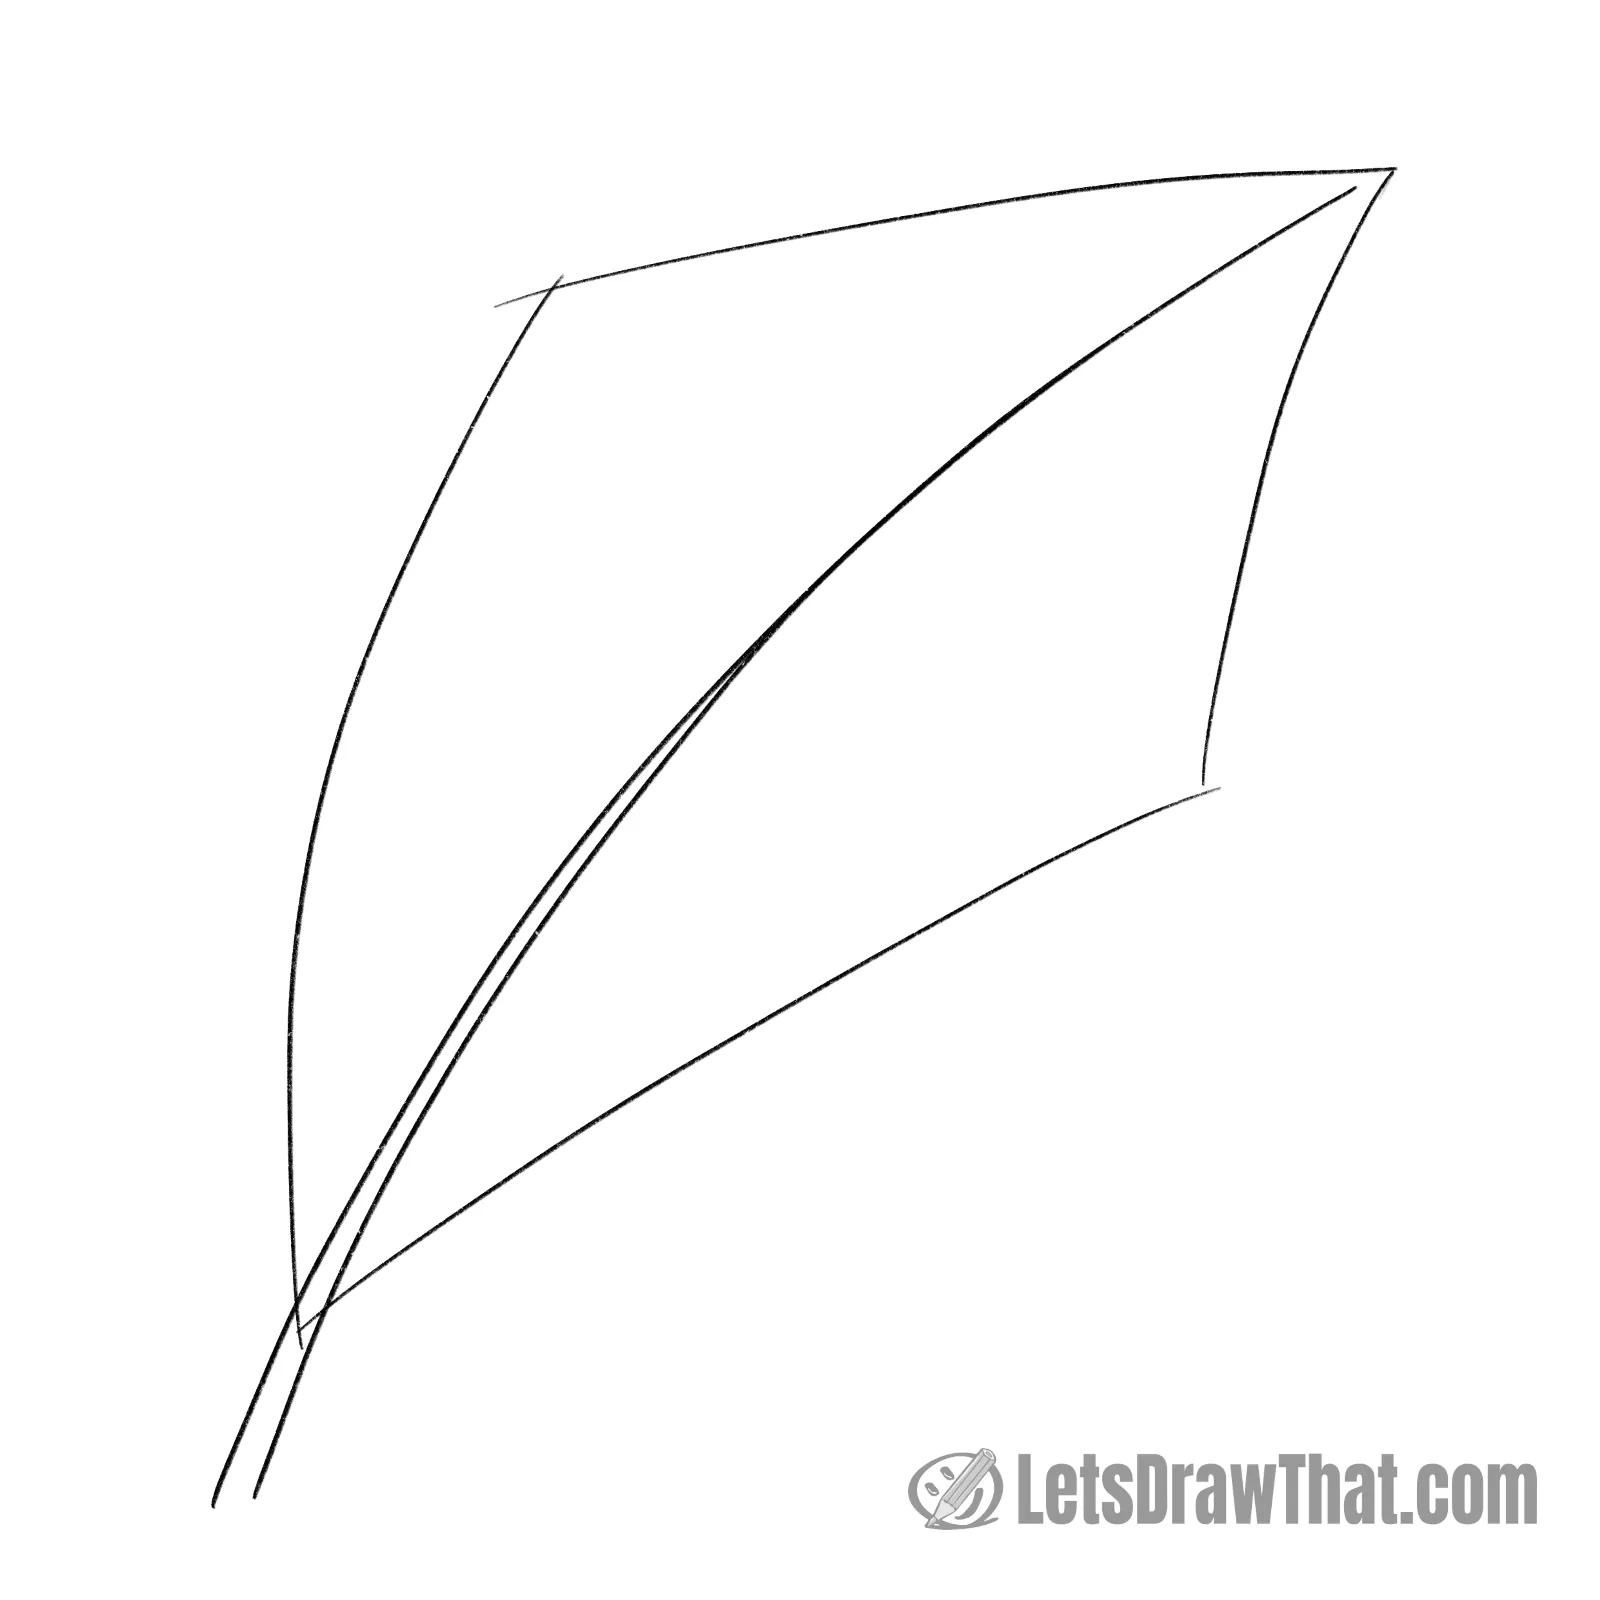
Let’s start with a simple outline sketch for the overall leaf shape.
Again, start with the leaf midrib. This time, we are doubling up the line already in the sketch.
Then, draw a kite shape around the midrib. That is one upside-down “V” from the top plus a second “V” from the bottom, meeting about two-thirds up. All lines are slightly curved.
Leave some of the centreline sticking out at the bottom for the leaf stalk.
Step 2: Draw the leaf veins
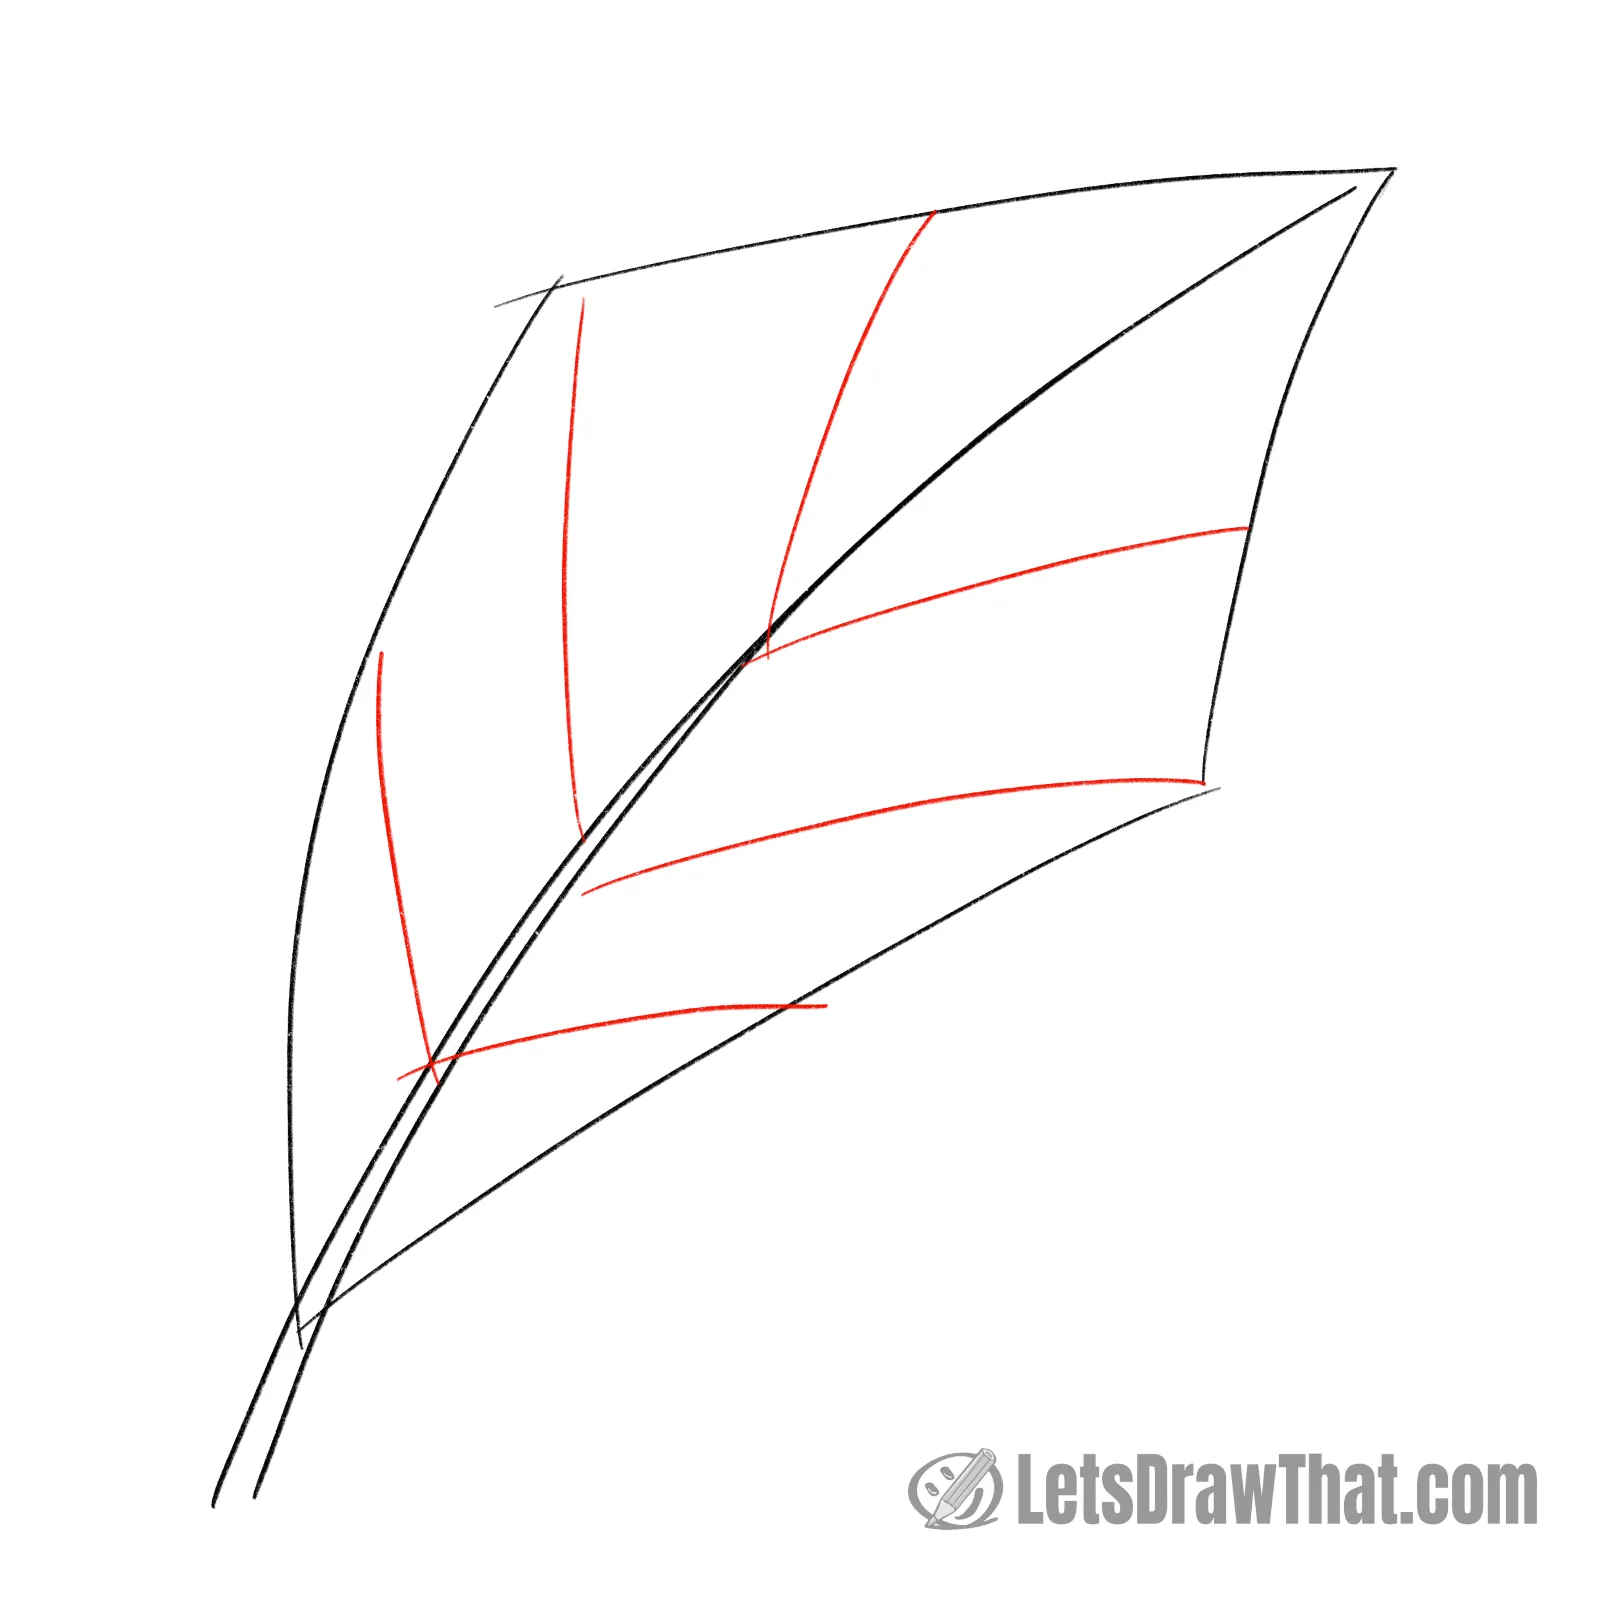
Next, add the leaf veins. As in the simple leaf above, these are two curved “V”-shaped lines from the midrib to the edge of the leaf blade.
Start with the middle two veins that go into the corners of the outer kite shape. Then, draw the remaining two sets of veins halfway between the middle and leaf ends.
Oak fall leaf drawing: outline the drawing step by step
Step 1: Draw the oak leaf's outer shape
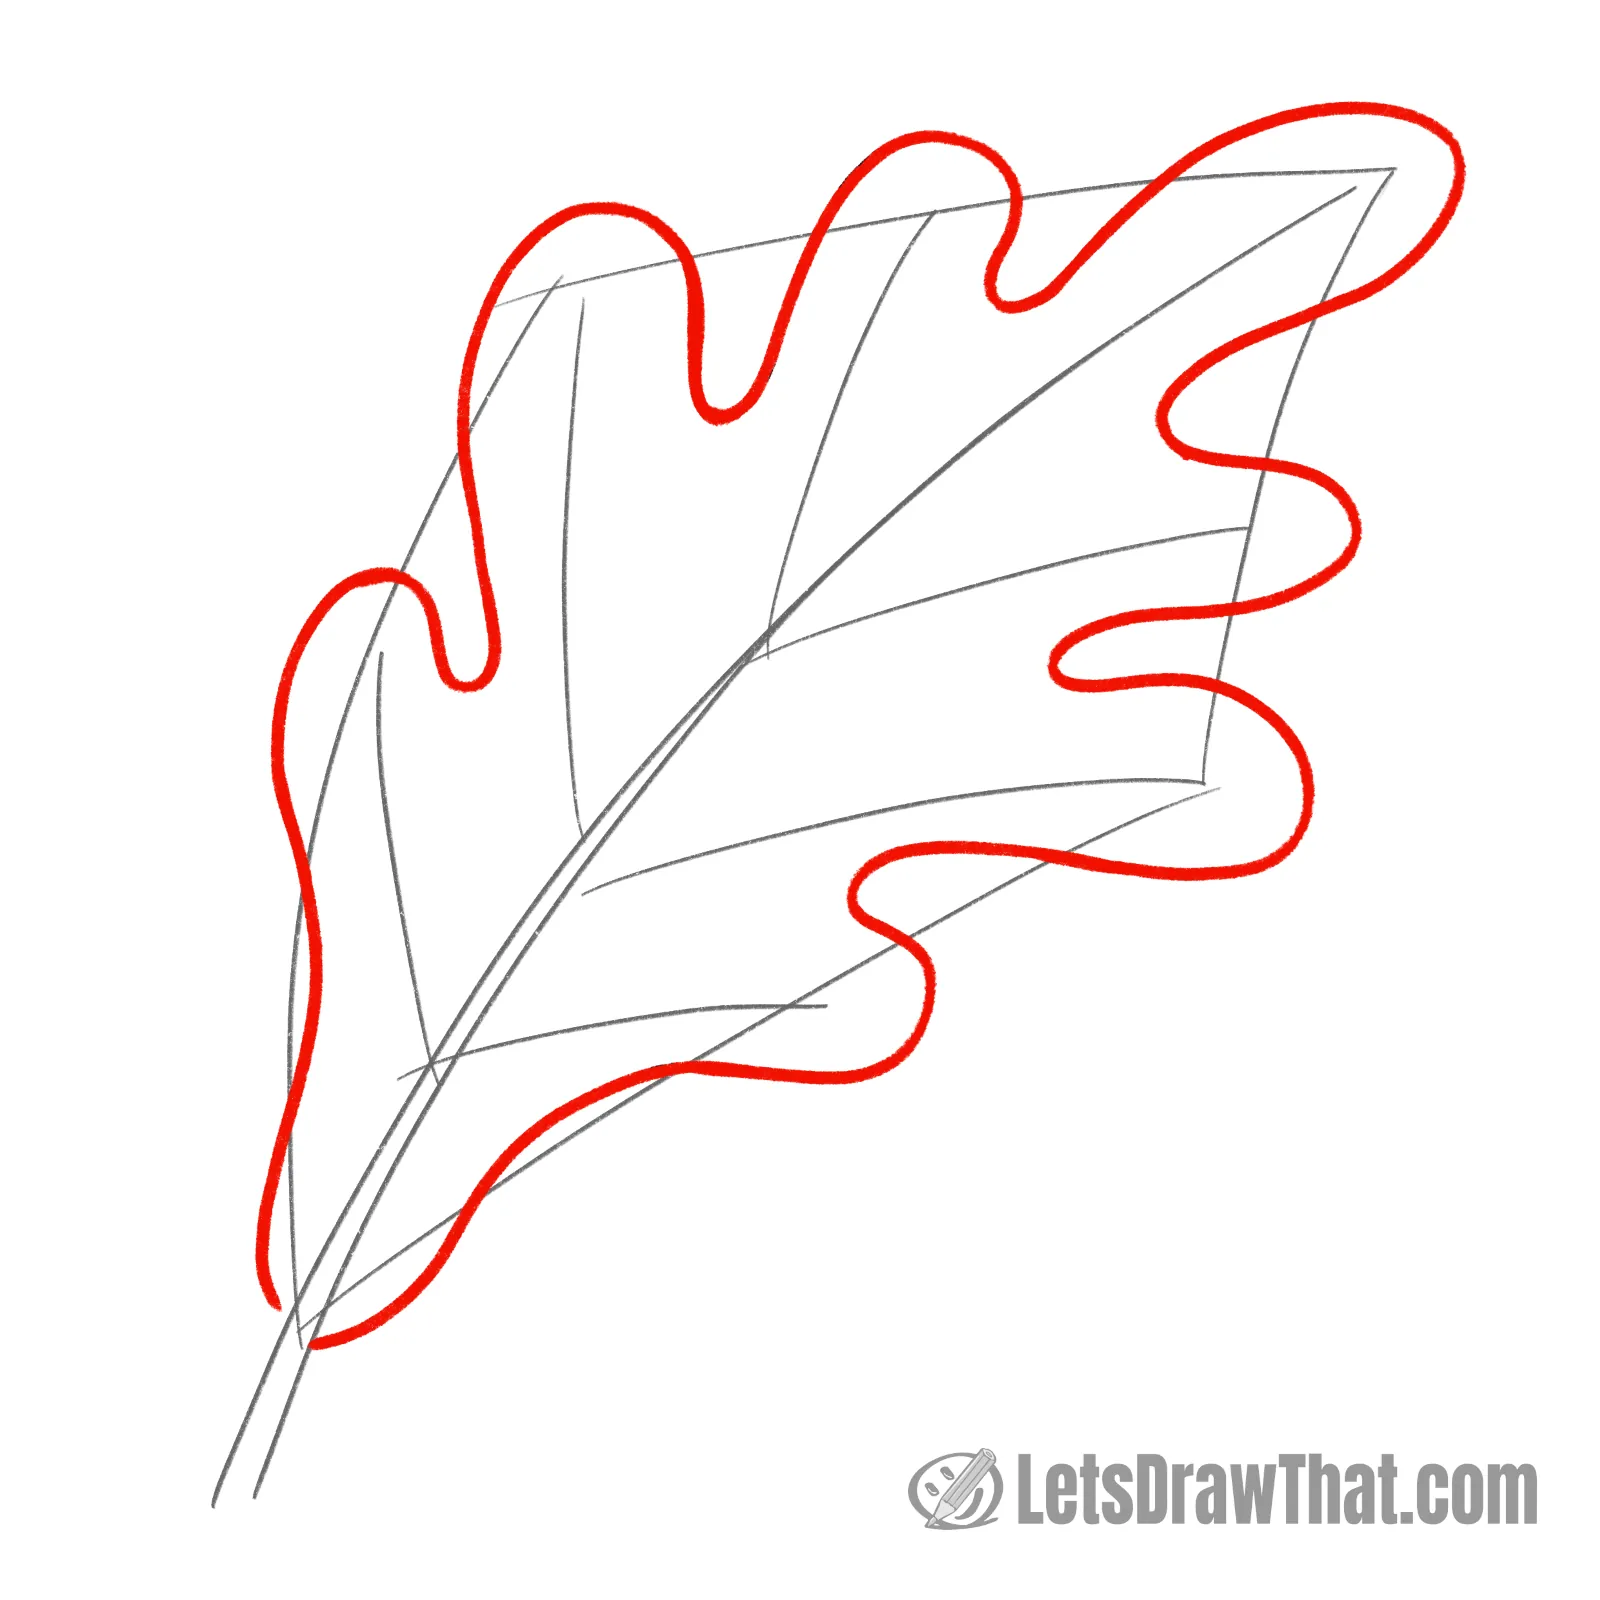
Here comes the tricky but fun part! Draw the squiggly outline of the oak leaf.
See how we are using the sketch to guide the squiggles – there is one “blob” around each of the veins and the leaf tip. All those are connected with a small curve into a single line.
Notice that the bottom of the leaf blade also makes a curved “blob” around the stem, similar to the one on the other side at the tip.
The curved “blobs” do not need to be perfect or regular, just try to size them to keep the overall “kite” shape of the leaf blade.
Step 2: Draw the midrib and leaf veins
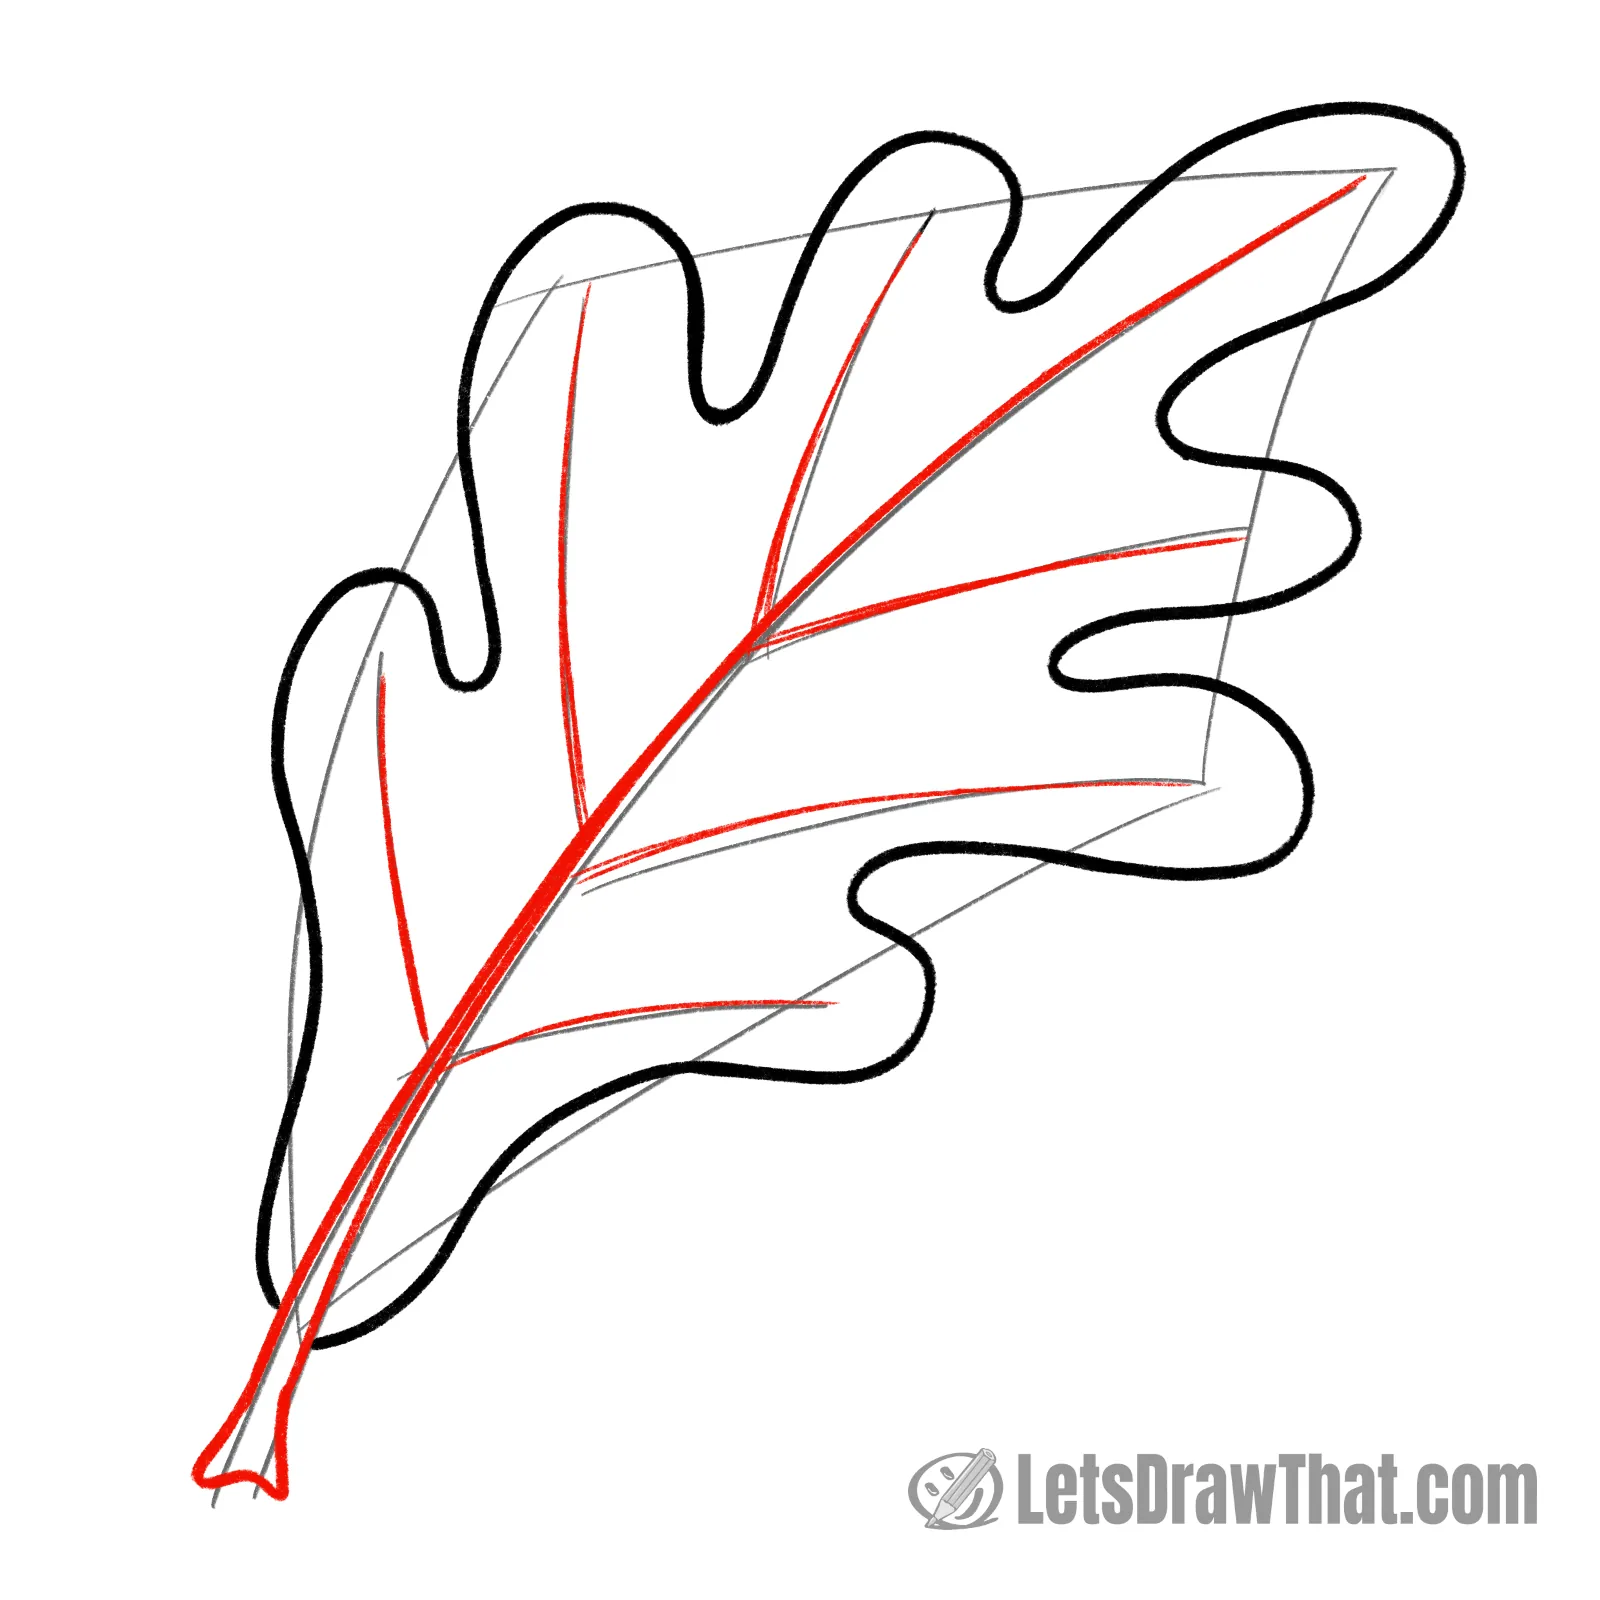
With the outer shape done, the hard work is over. All you need to do now is outline the midrib and the veins.
Here we are again doubling out the veins, the same as in the easy leaf – no surprises there.
Also, notice another way to end your stalk – this time, the end is just a simple kind of upside-down wide “U” curve connected to the stalk edges with small rounded corners.
Here is a chance to practice more leaf shapes:

How to Draw a Palm Tree: Easy Awesome Palm Tree Drawing
Learn how to draw a palm tree. Step-by-step you will learn to draw an awesome coconut palm tree standing on a small island beach.Oak fall leaf drawing finished
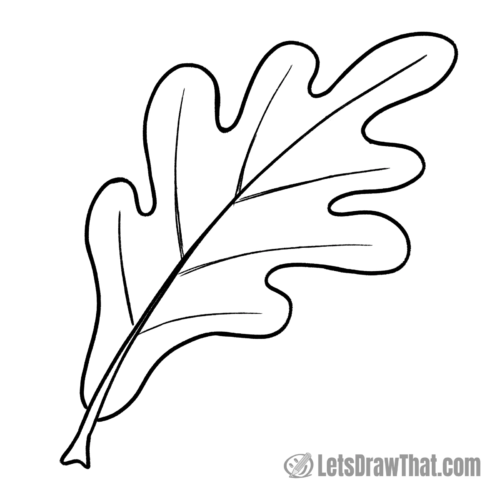
Oak fall leaf drawing outline

And here is the result of the second part of the “how to draw leaves” tutorial – a lovely oak tree leaf.
Now, let’s add some color to turn it into a fall leaf drawing.
Oak fall leaf drawing colored-in
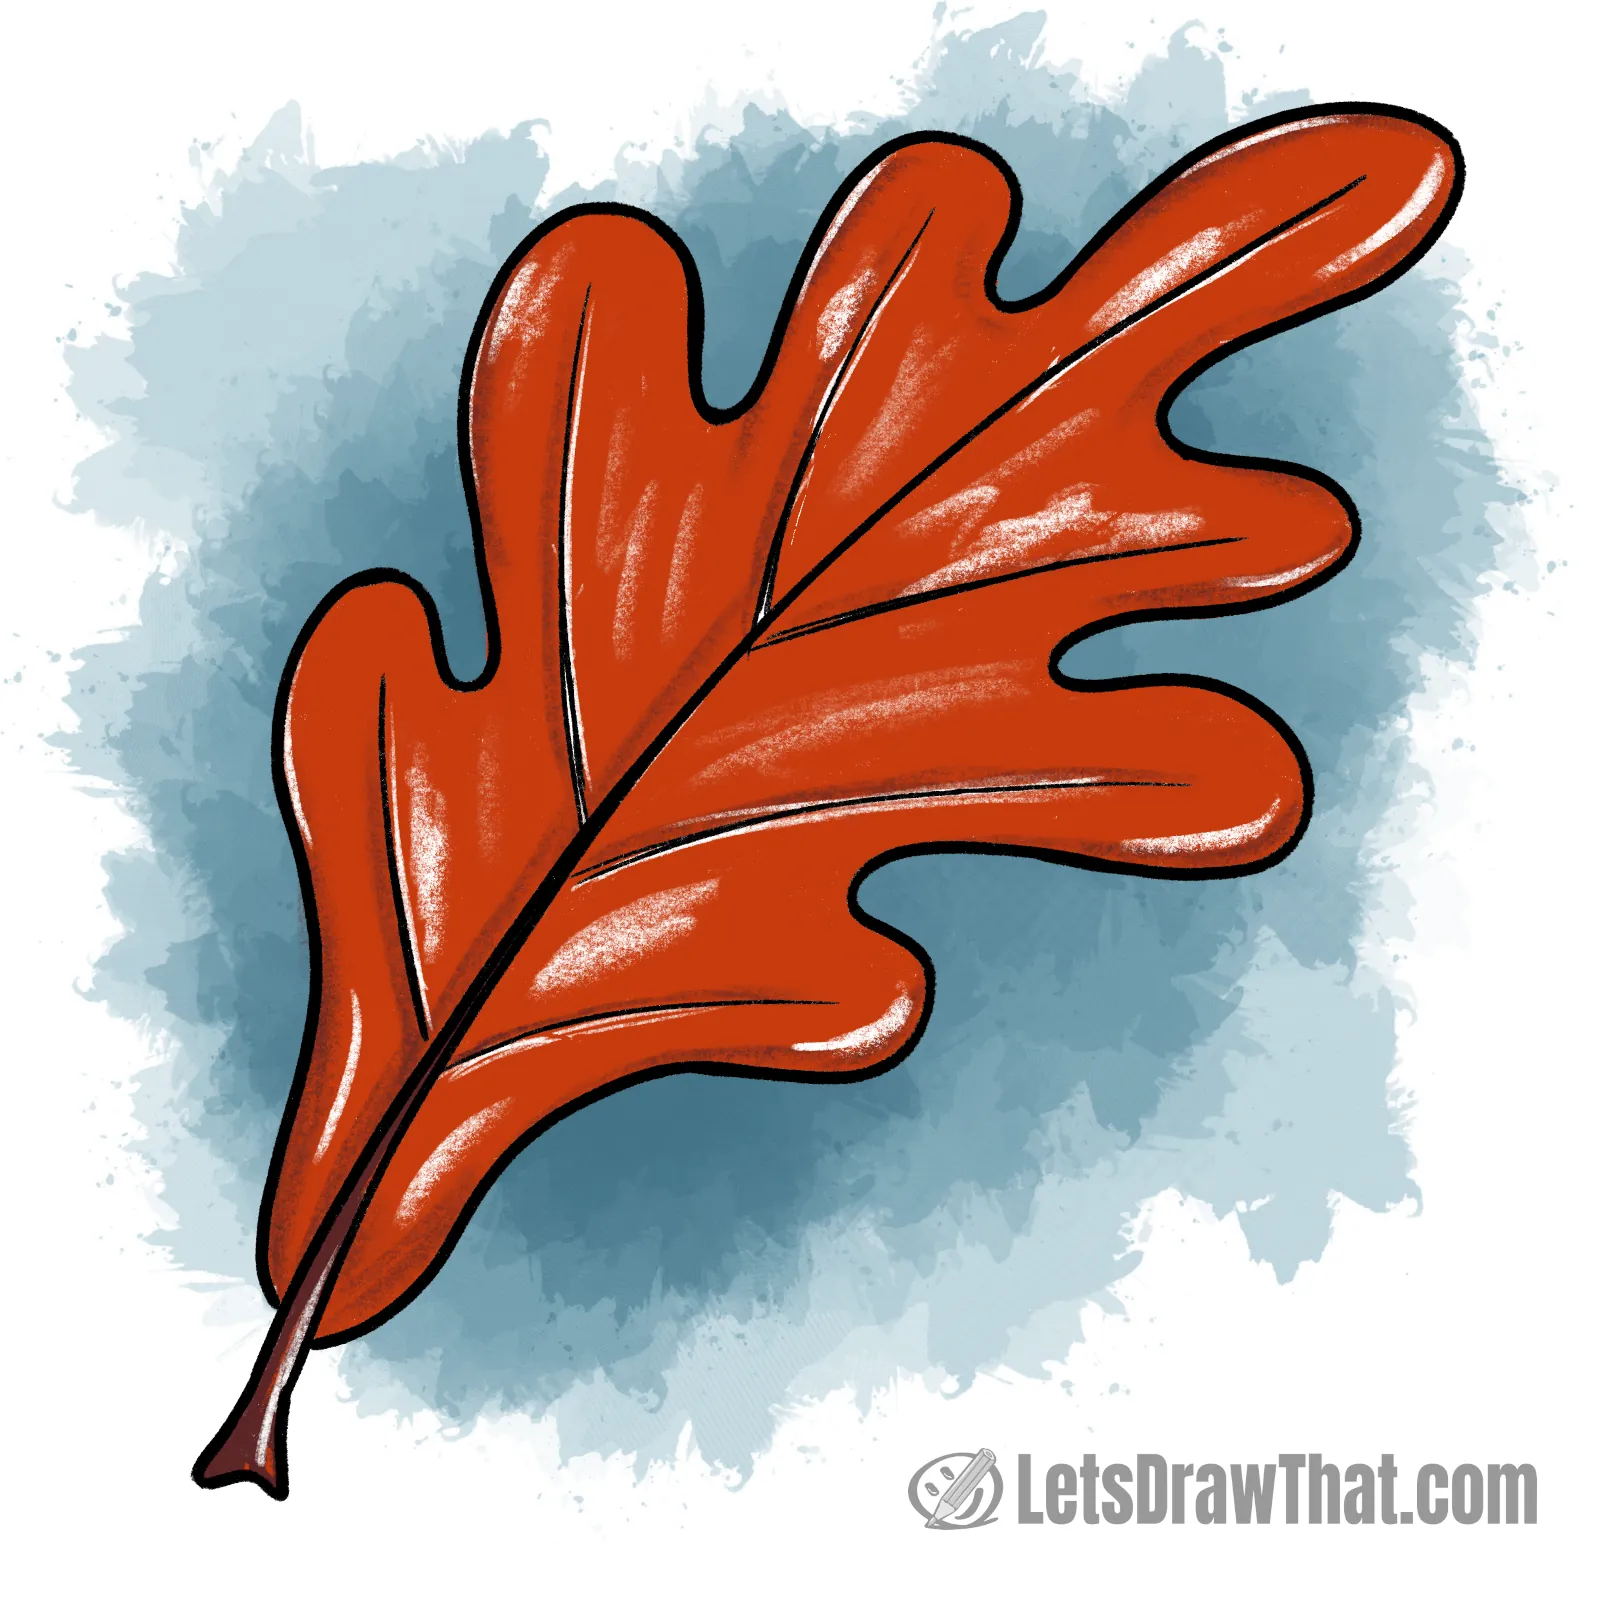
For some variety, we have made this a fall leaf drawing and colored the blade of our oak leaf a burnt orange-brown. This is the color of oak leaves when they stay on the tree over the winter.
Similar to the previous leaf, we have used some darker brown color for shading and coloring the midrib and the veins. We have also left out some white highlights to give the leaf more volume.
How to draw leaves: a maple autumn leaf drawing

For our third leaf drawing, we go even crazier with the jagged edges. Again, following the sketched base shape of the leaf makes drawing the complex outline easier.
This one turned out to be a maple leaf, and since we can choose any color, we have made it yellow with some orange-red edges to add some variety to the set of our leaf drawings. That makes it another autumn leaf drawing.
Maple autumn leaf drawing: base sketch step by step
Step 1: Draw the midrib and main leaf veins
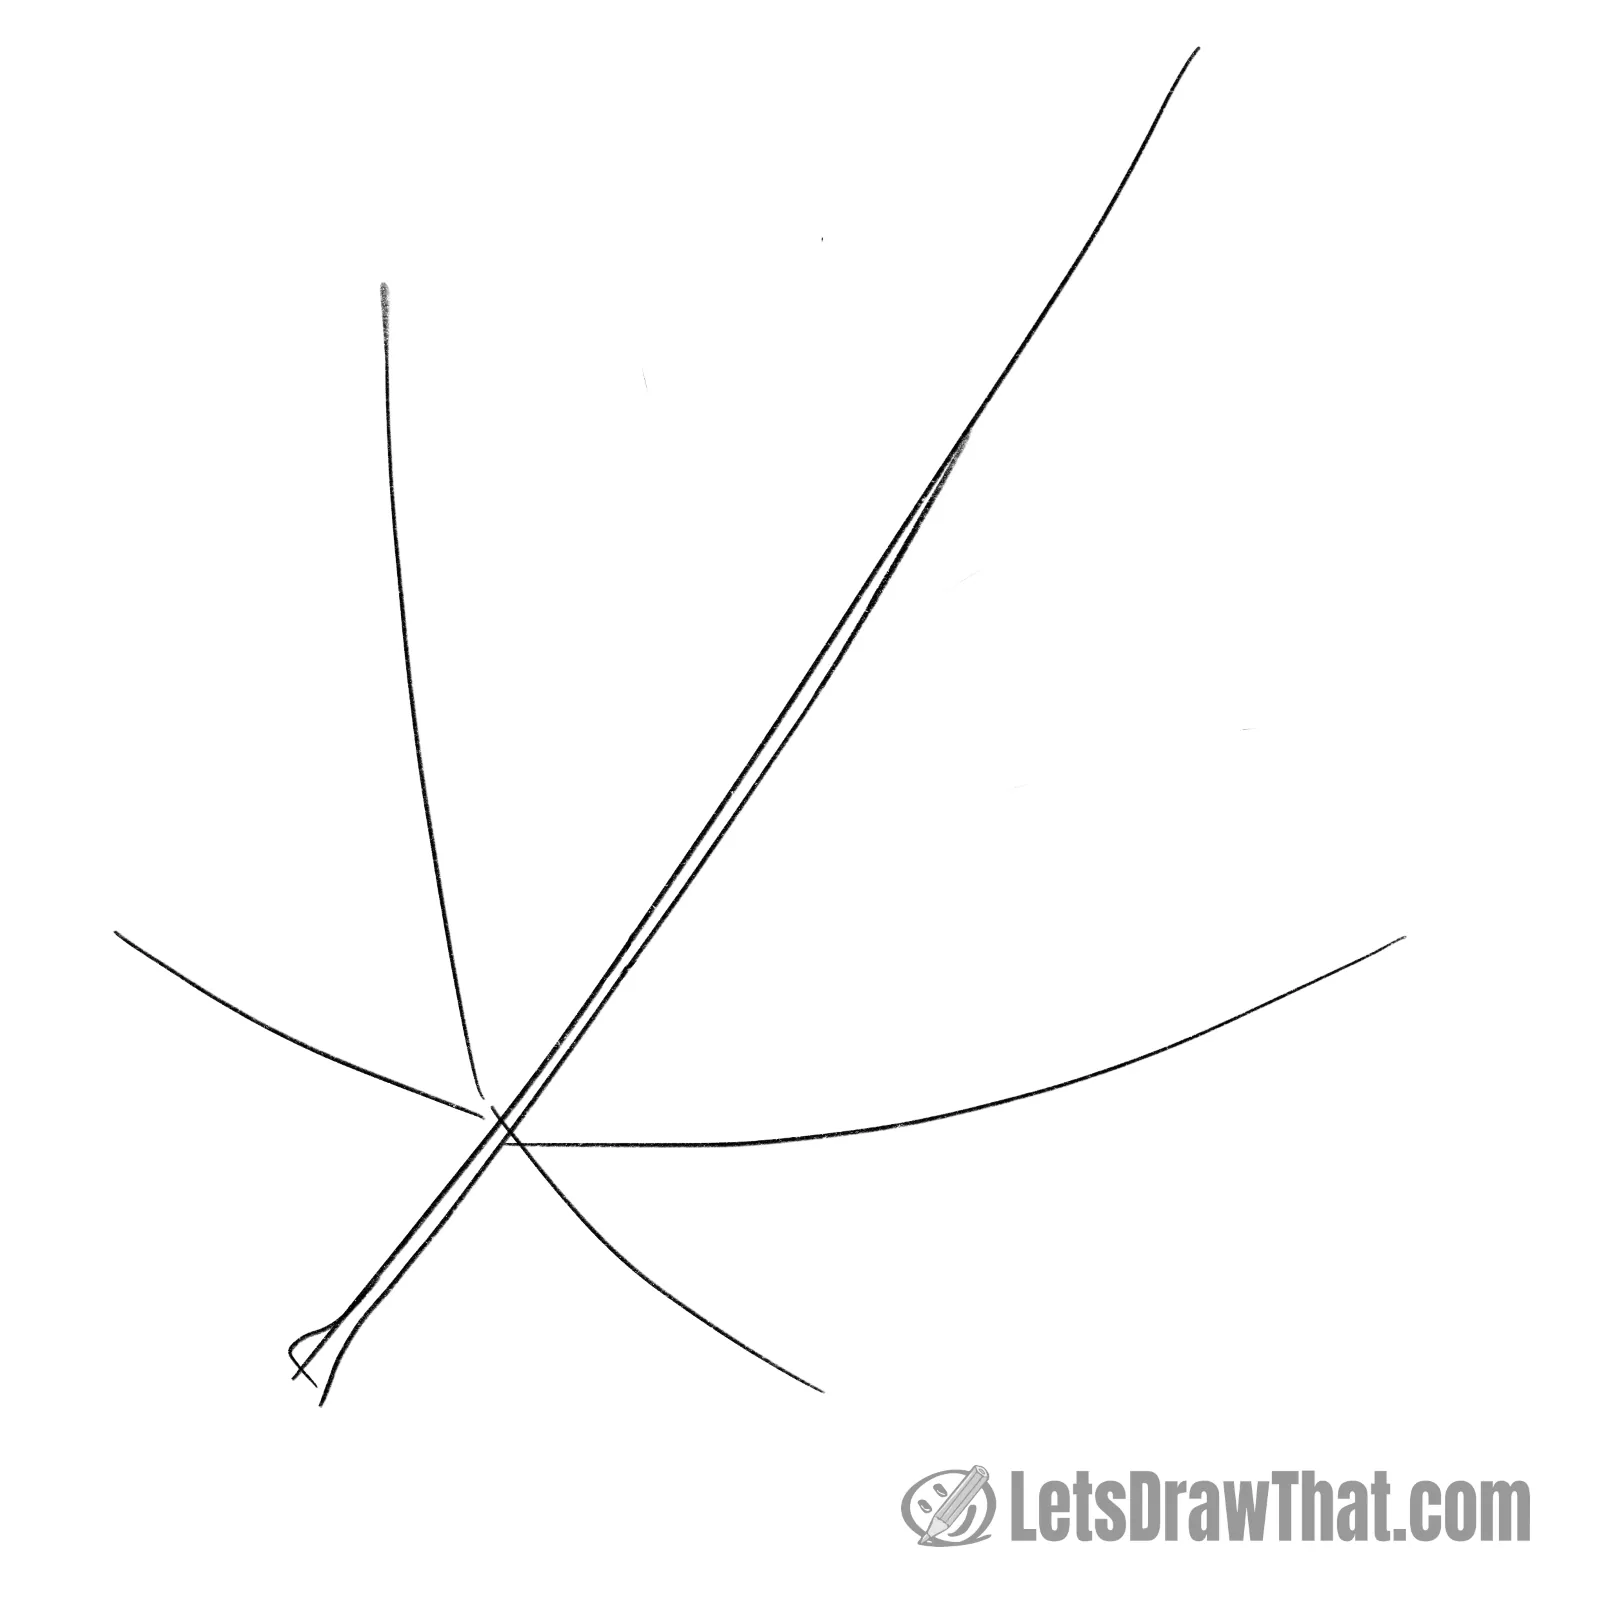
Here we go again, starting to lay out the base structure of the leaf.
Draw the long stalk/midrib line first. Here, we are doubling it up and adding the widened stalk end as well.
Then, add the four main leaf veins. Both pairs are slightly curved. The top pair is longer, the bottom one shorter.
Step 2: Sketch the leaf blade outline shape
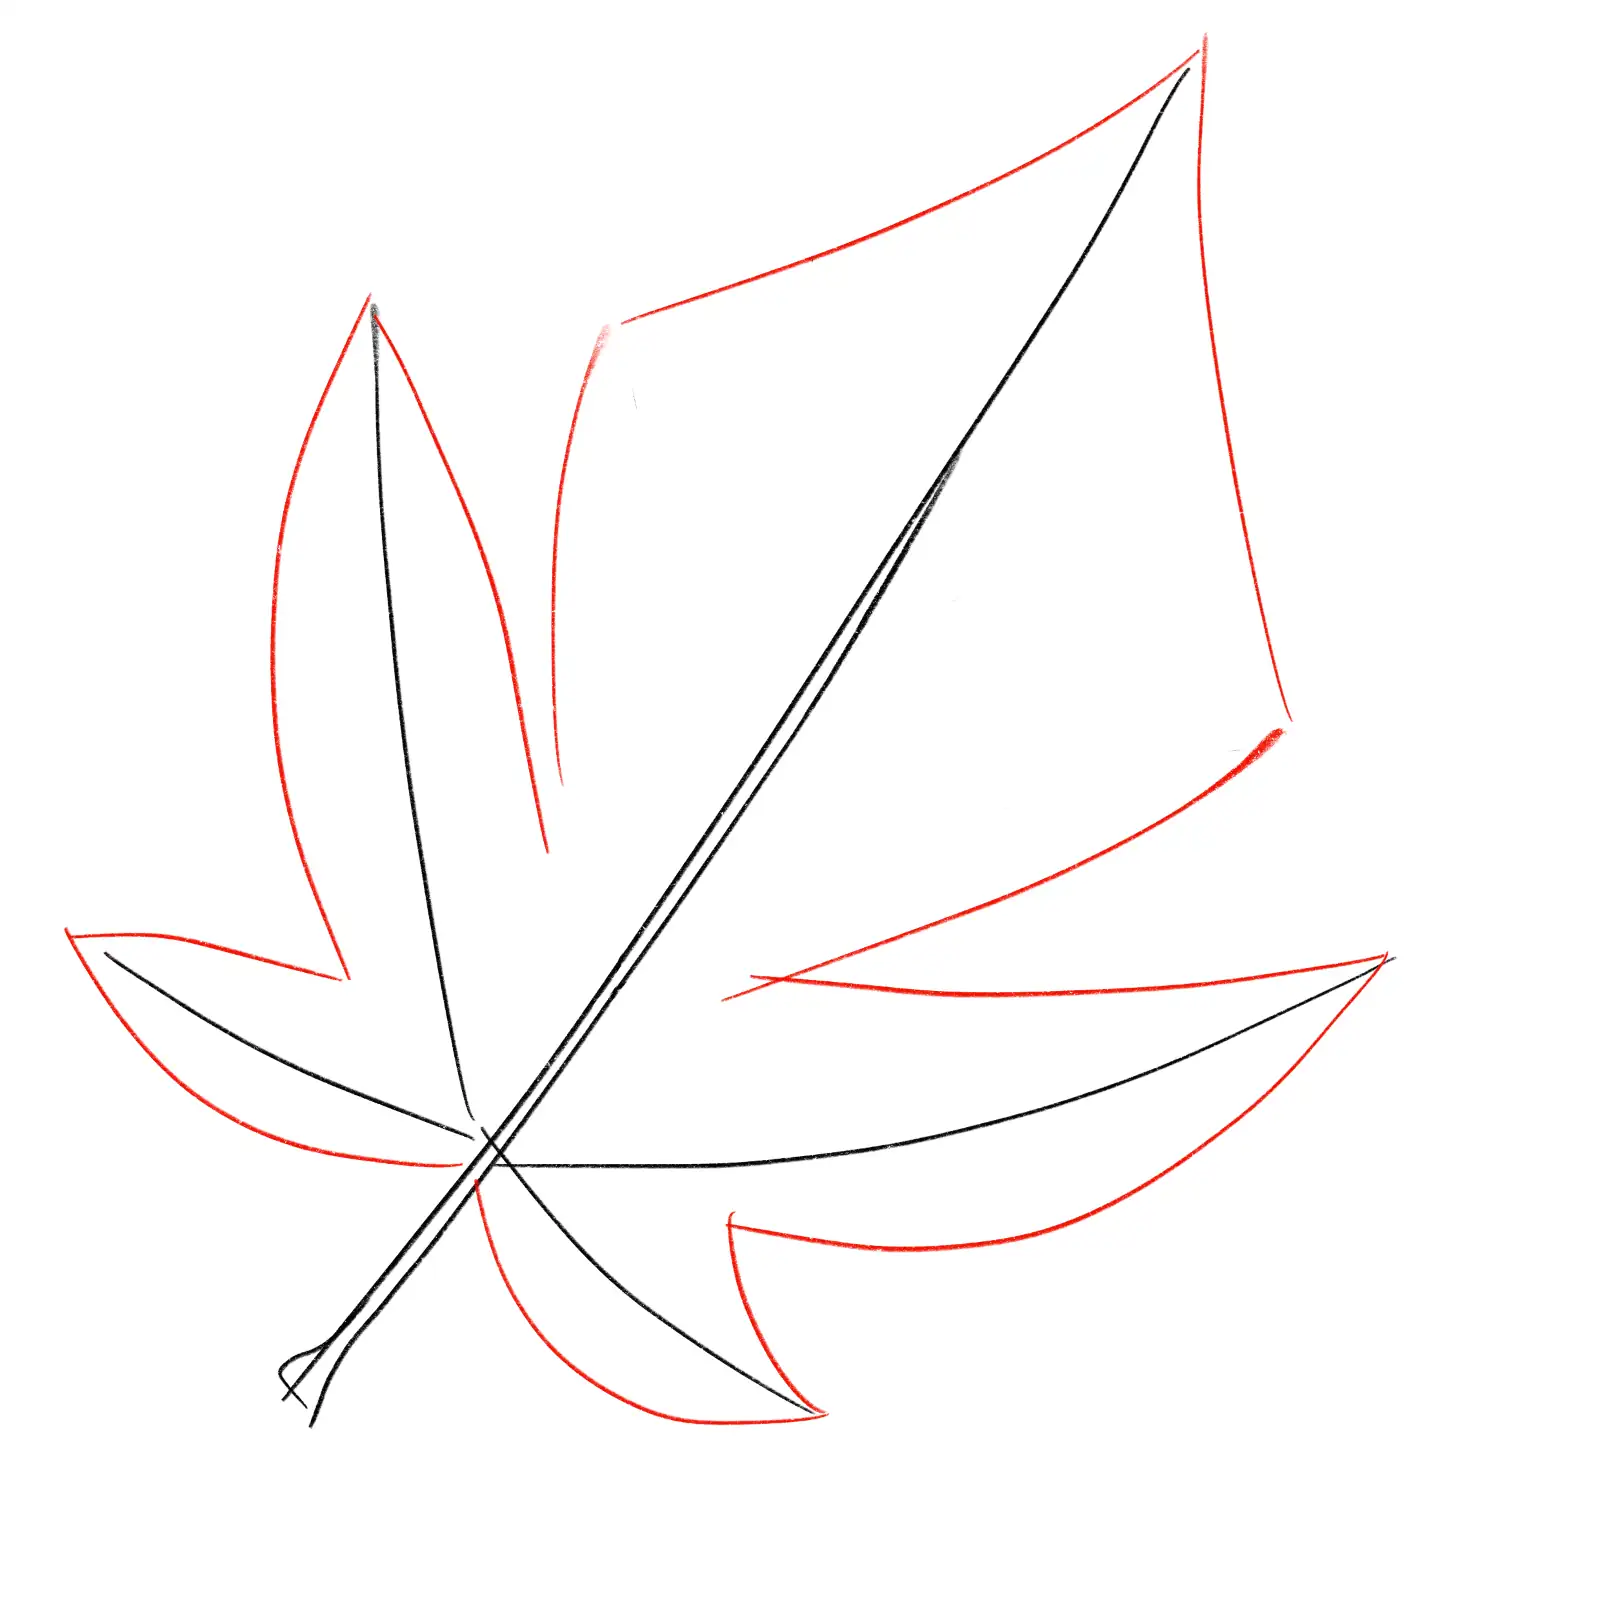
Next, we are adding the guidelines for the leaf’s outer edges.
Draw a kite shape – similar to the oak there above – around the long midrib top.
Add banana shapes around the remaining four veins – similar to the first easy leaf drawing. Notice the ones on the left have both sides curving out, while the ones on the right are bent upwards, with one side in and one side out.
Step 3: Add two more inner leaf veins
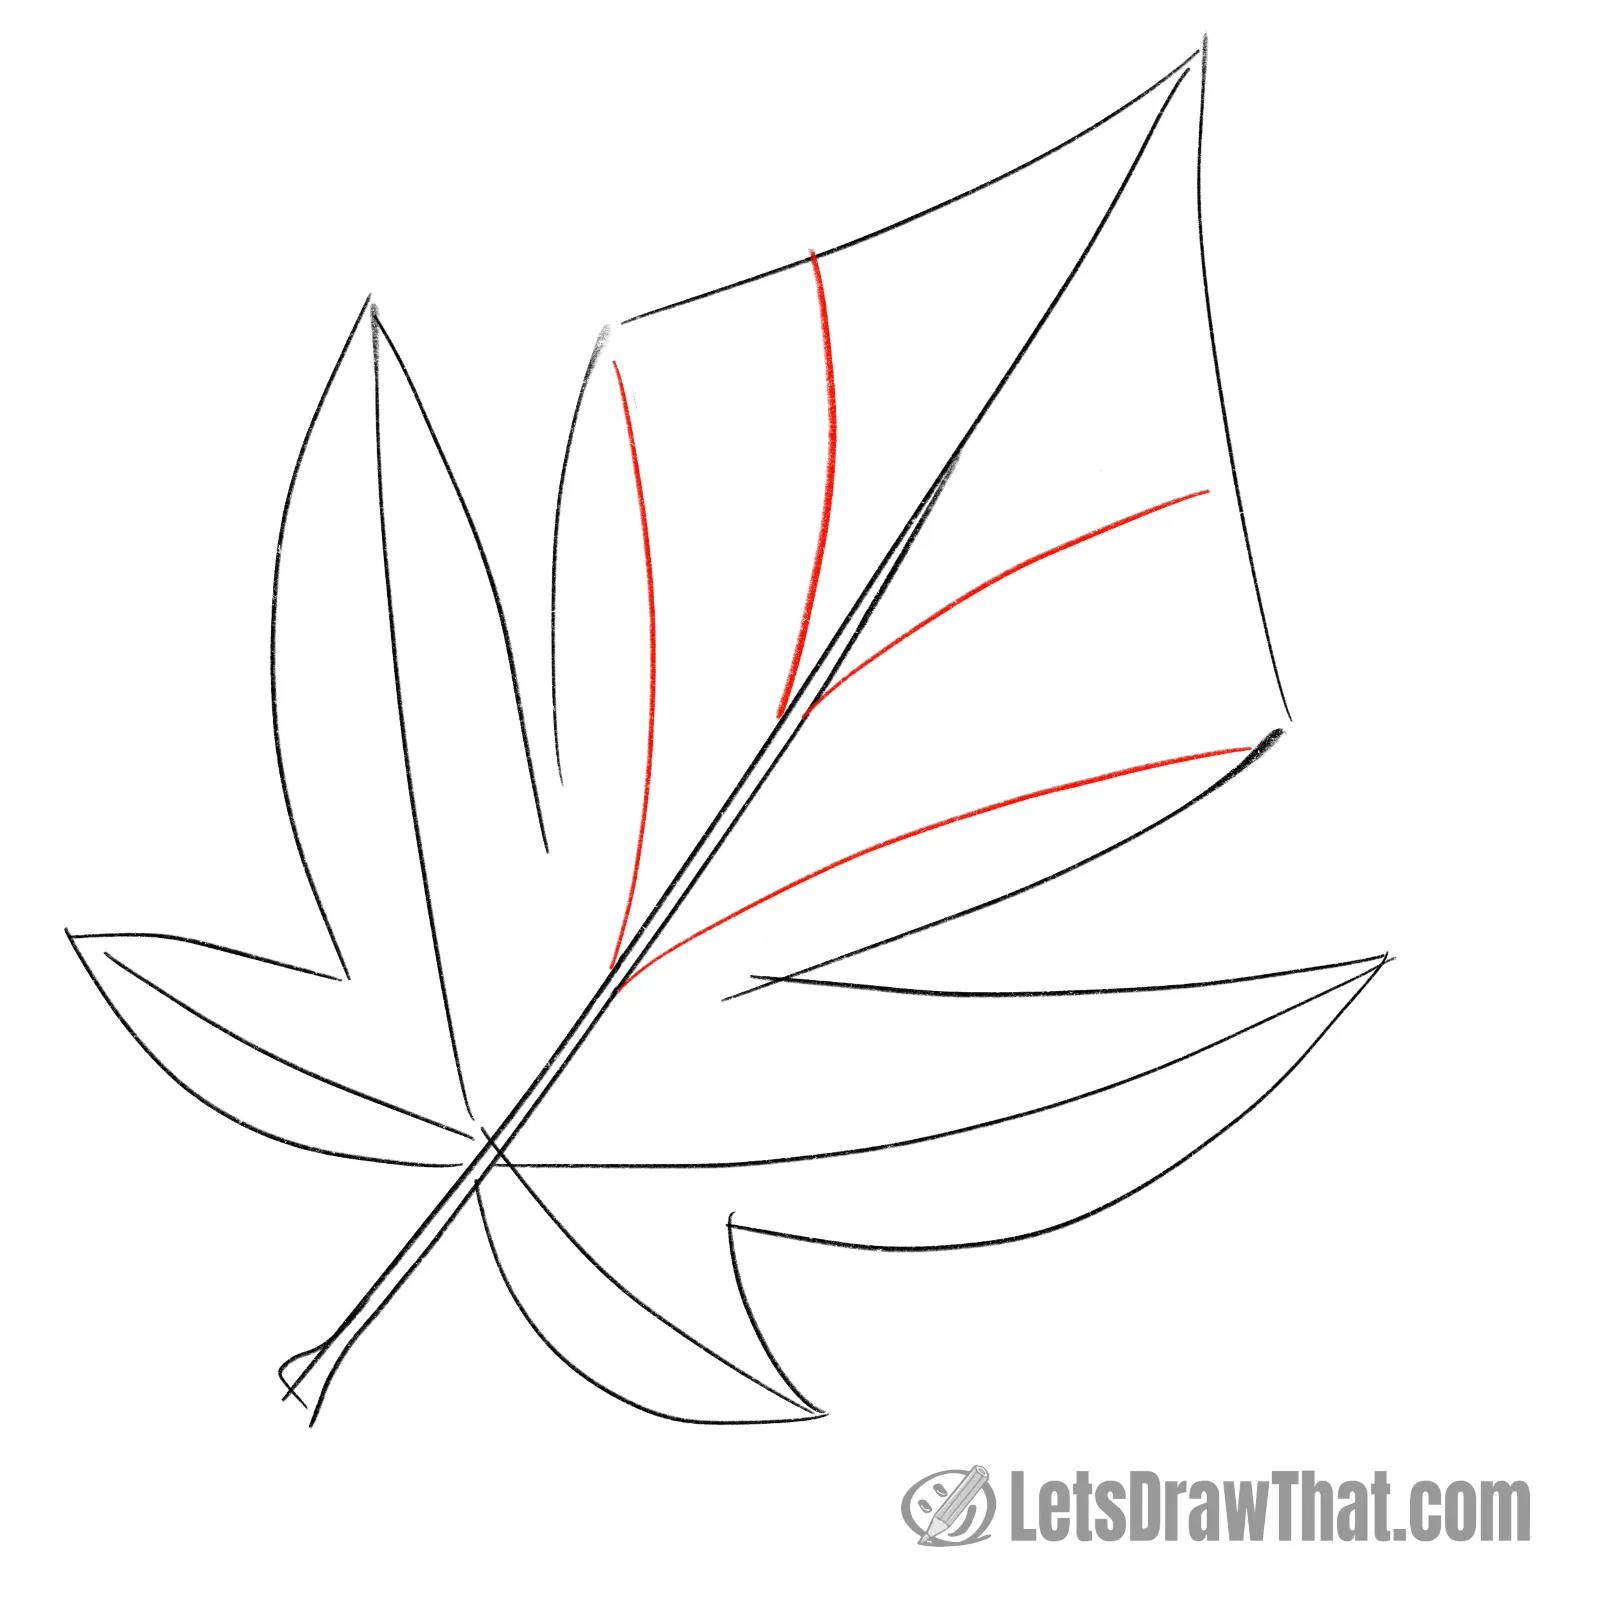
Draw two more inner leaf veins to the top kite-shaped section. These will help as guides when drawing the jagged leaf outline.
Both are open “V” shape, curved out – the other way than the bottom two veins.
Maple autumn leaf drawing: outline the drawing step by step
Step 1: Draw the jagged leaf outline
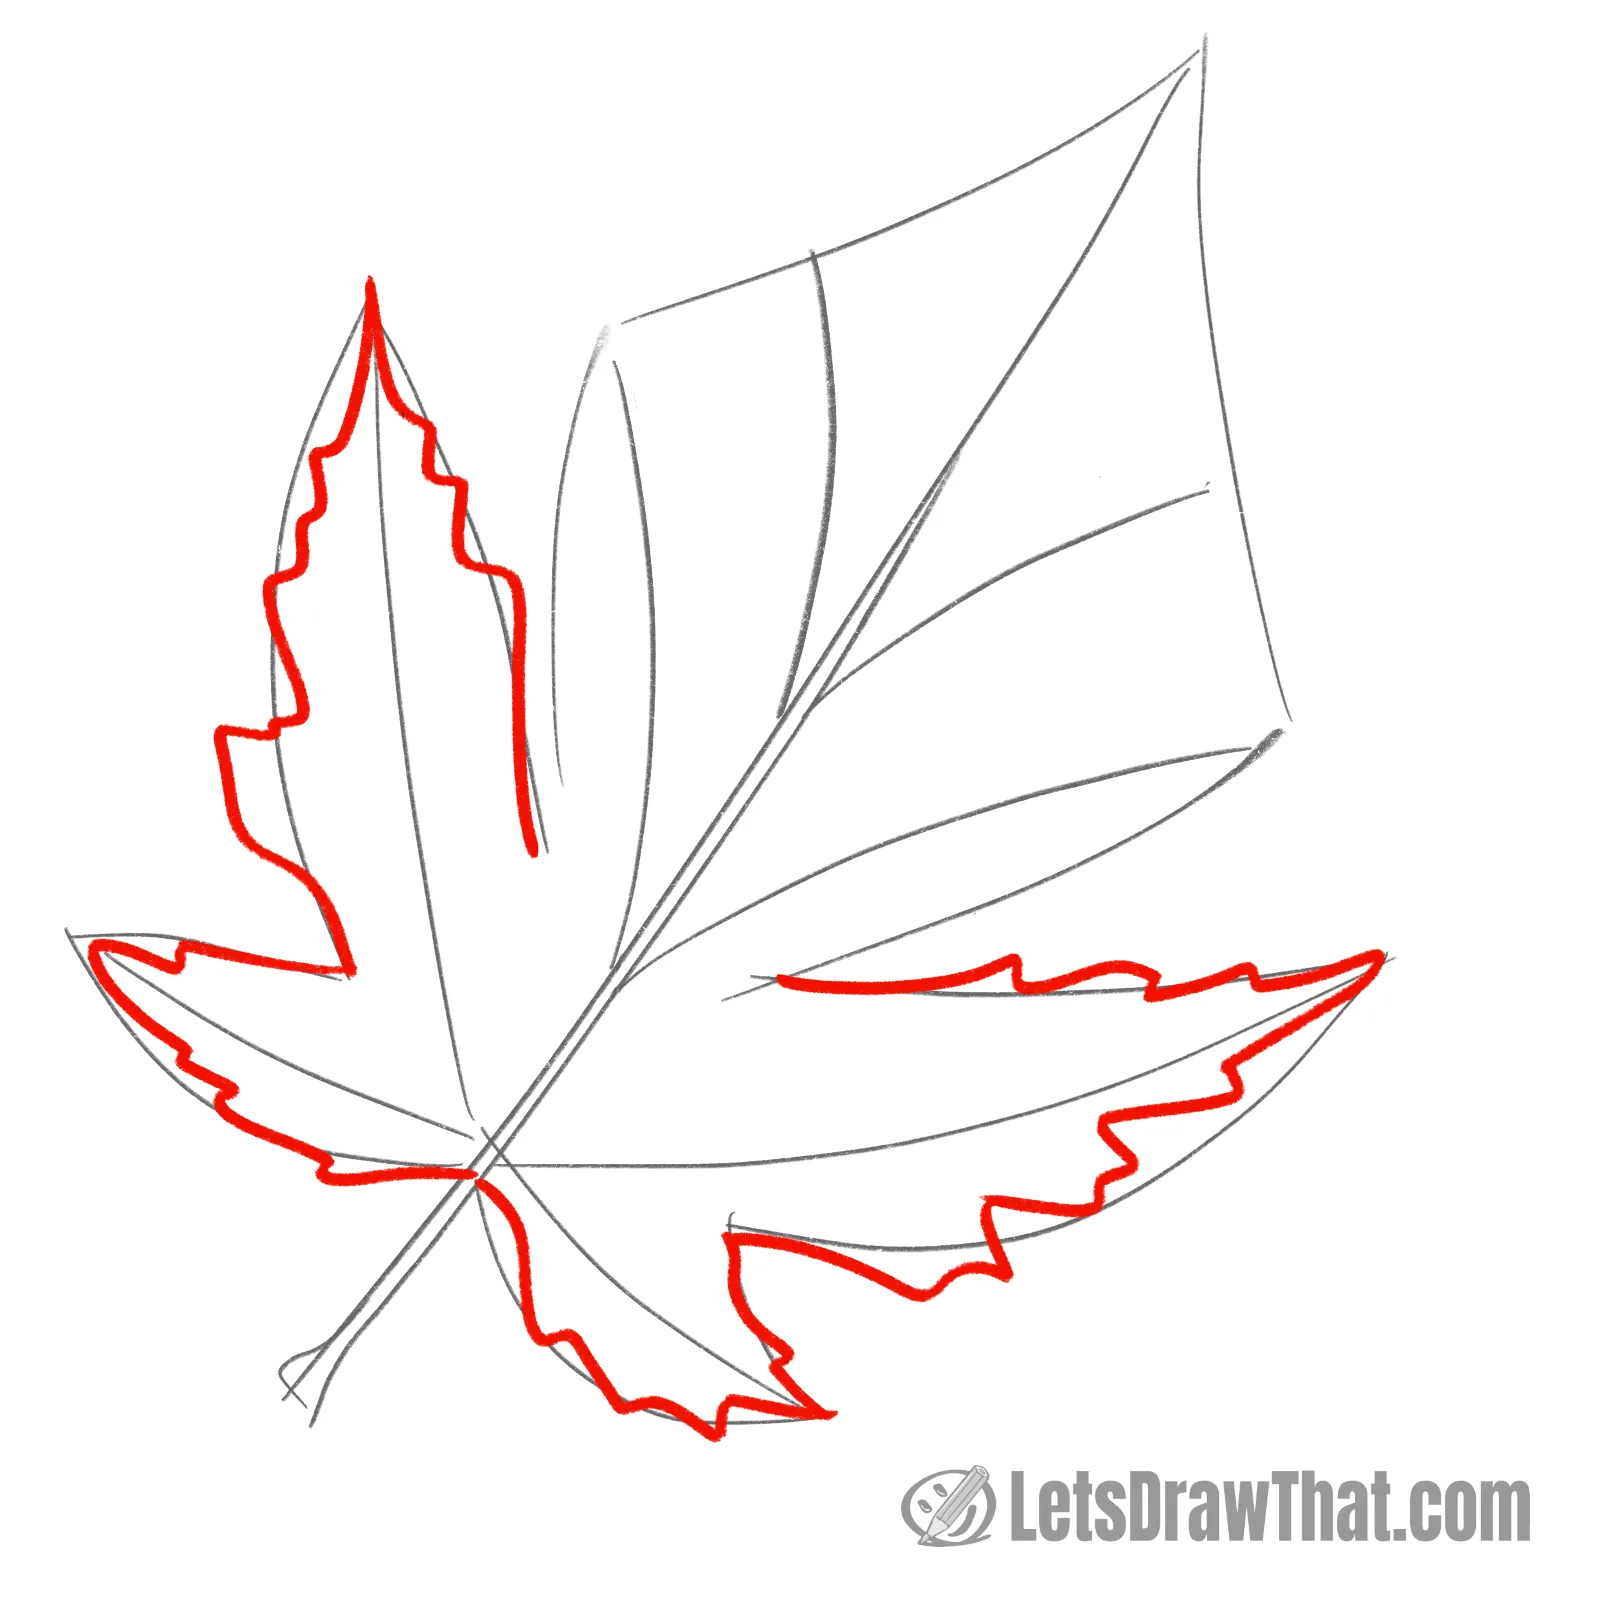
Here comes the fun bit – drawing the actual jagged outline of the leaf, starting with the parts around the bottom leaf veins.
Each part has a pointy end. The jagged edge line then roughly follows the sketched shape, widening out in sort of small steps.
The four sections meet in a sharp corner. The part at the bottom around the stalk makes a nice wide”U” shape.
Step 2: Finish the leaf outline
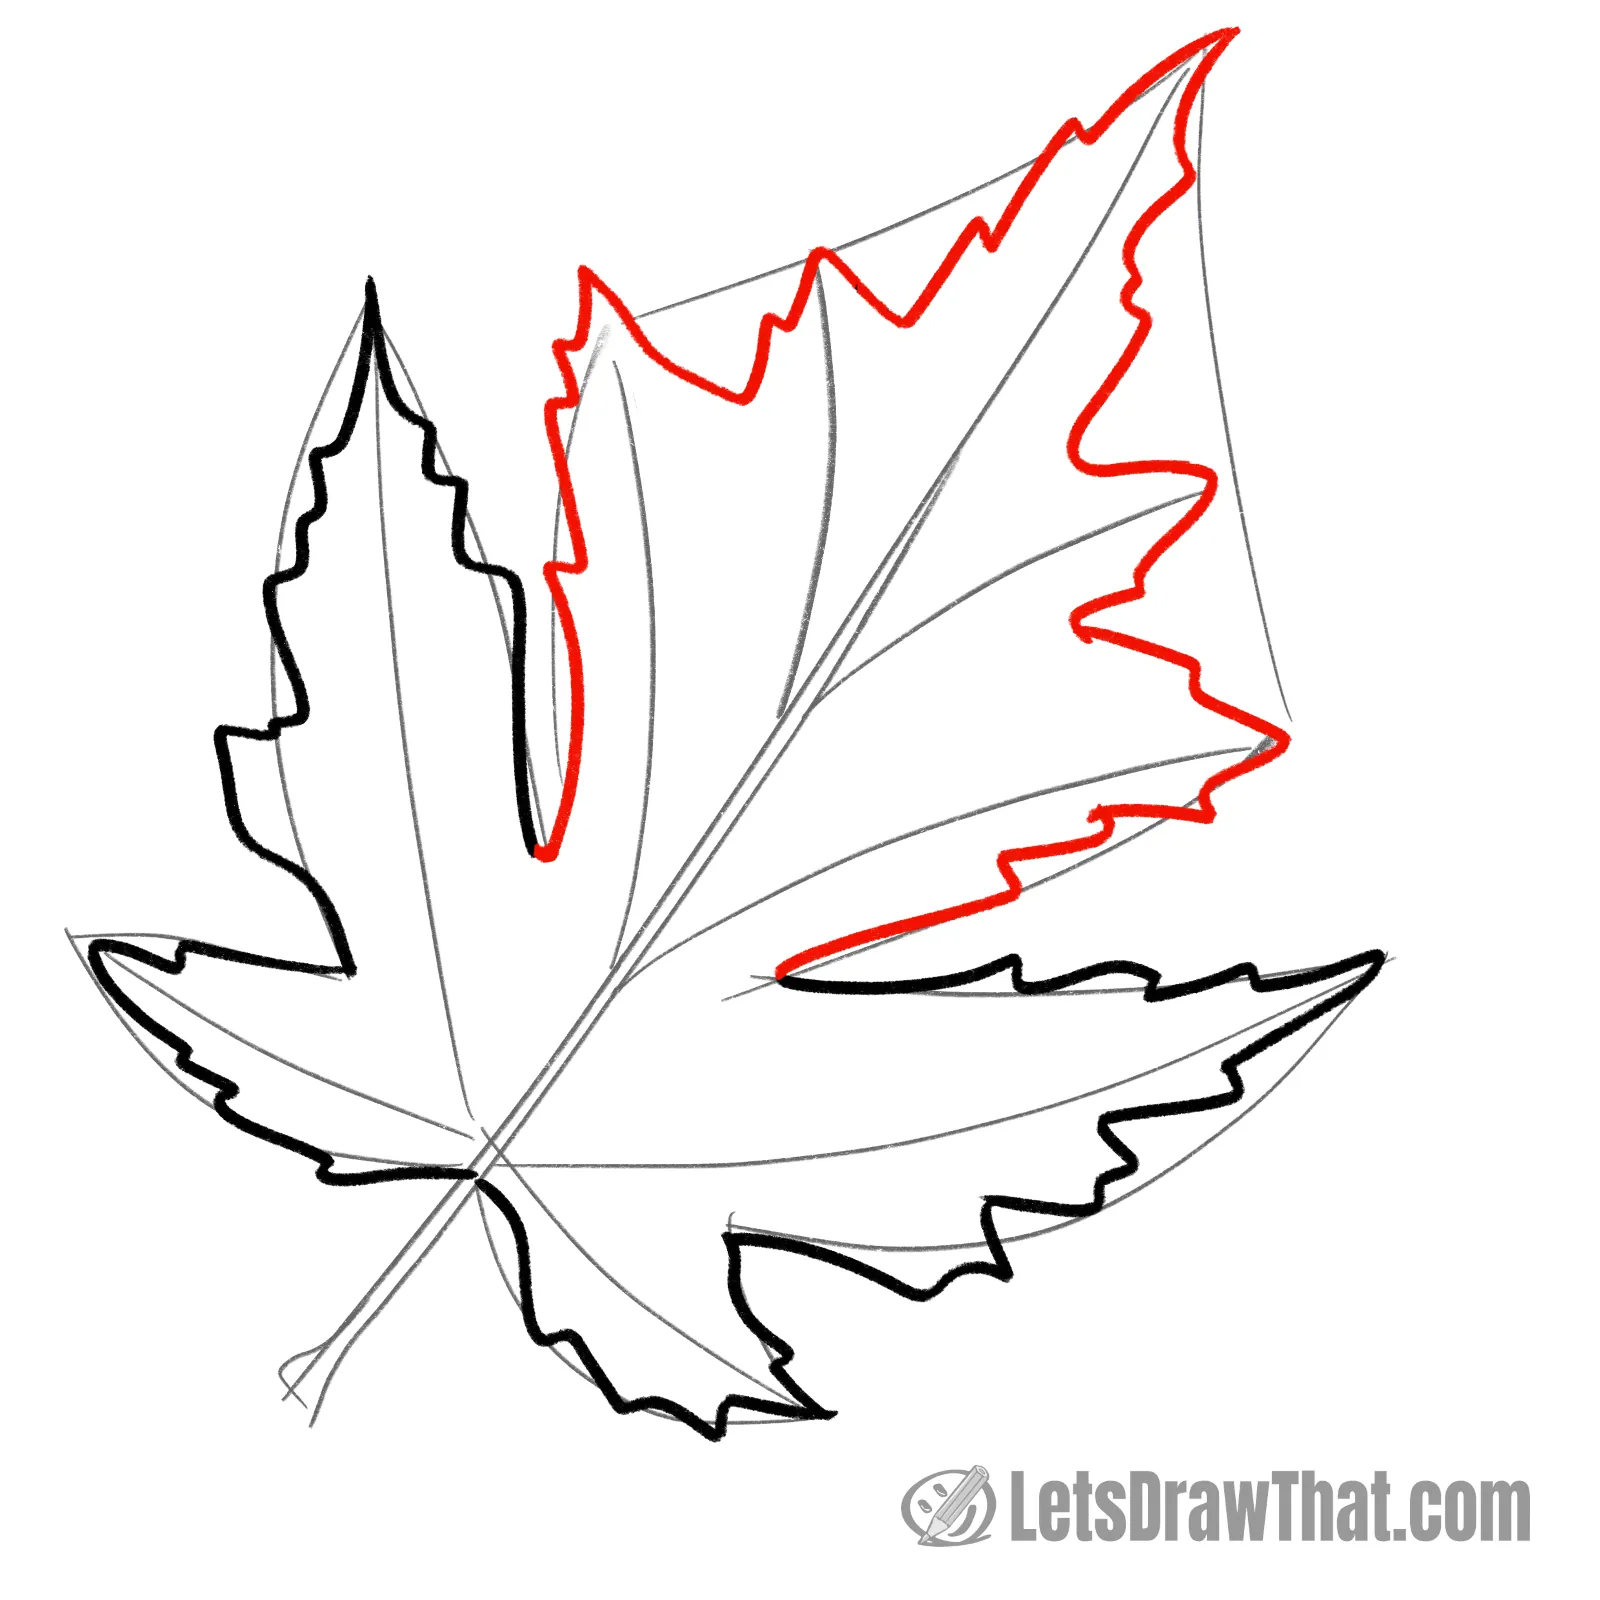
Next, complete the jagged outline around the top kite shape of the leaf.
Notice that there is a larger point sticking out around each of the veins and the midrib tip. The line between is then again the same jagged steps.
Step 3: Draw the leaf's midrib and veins
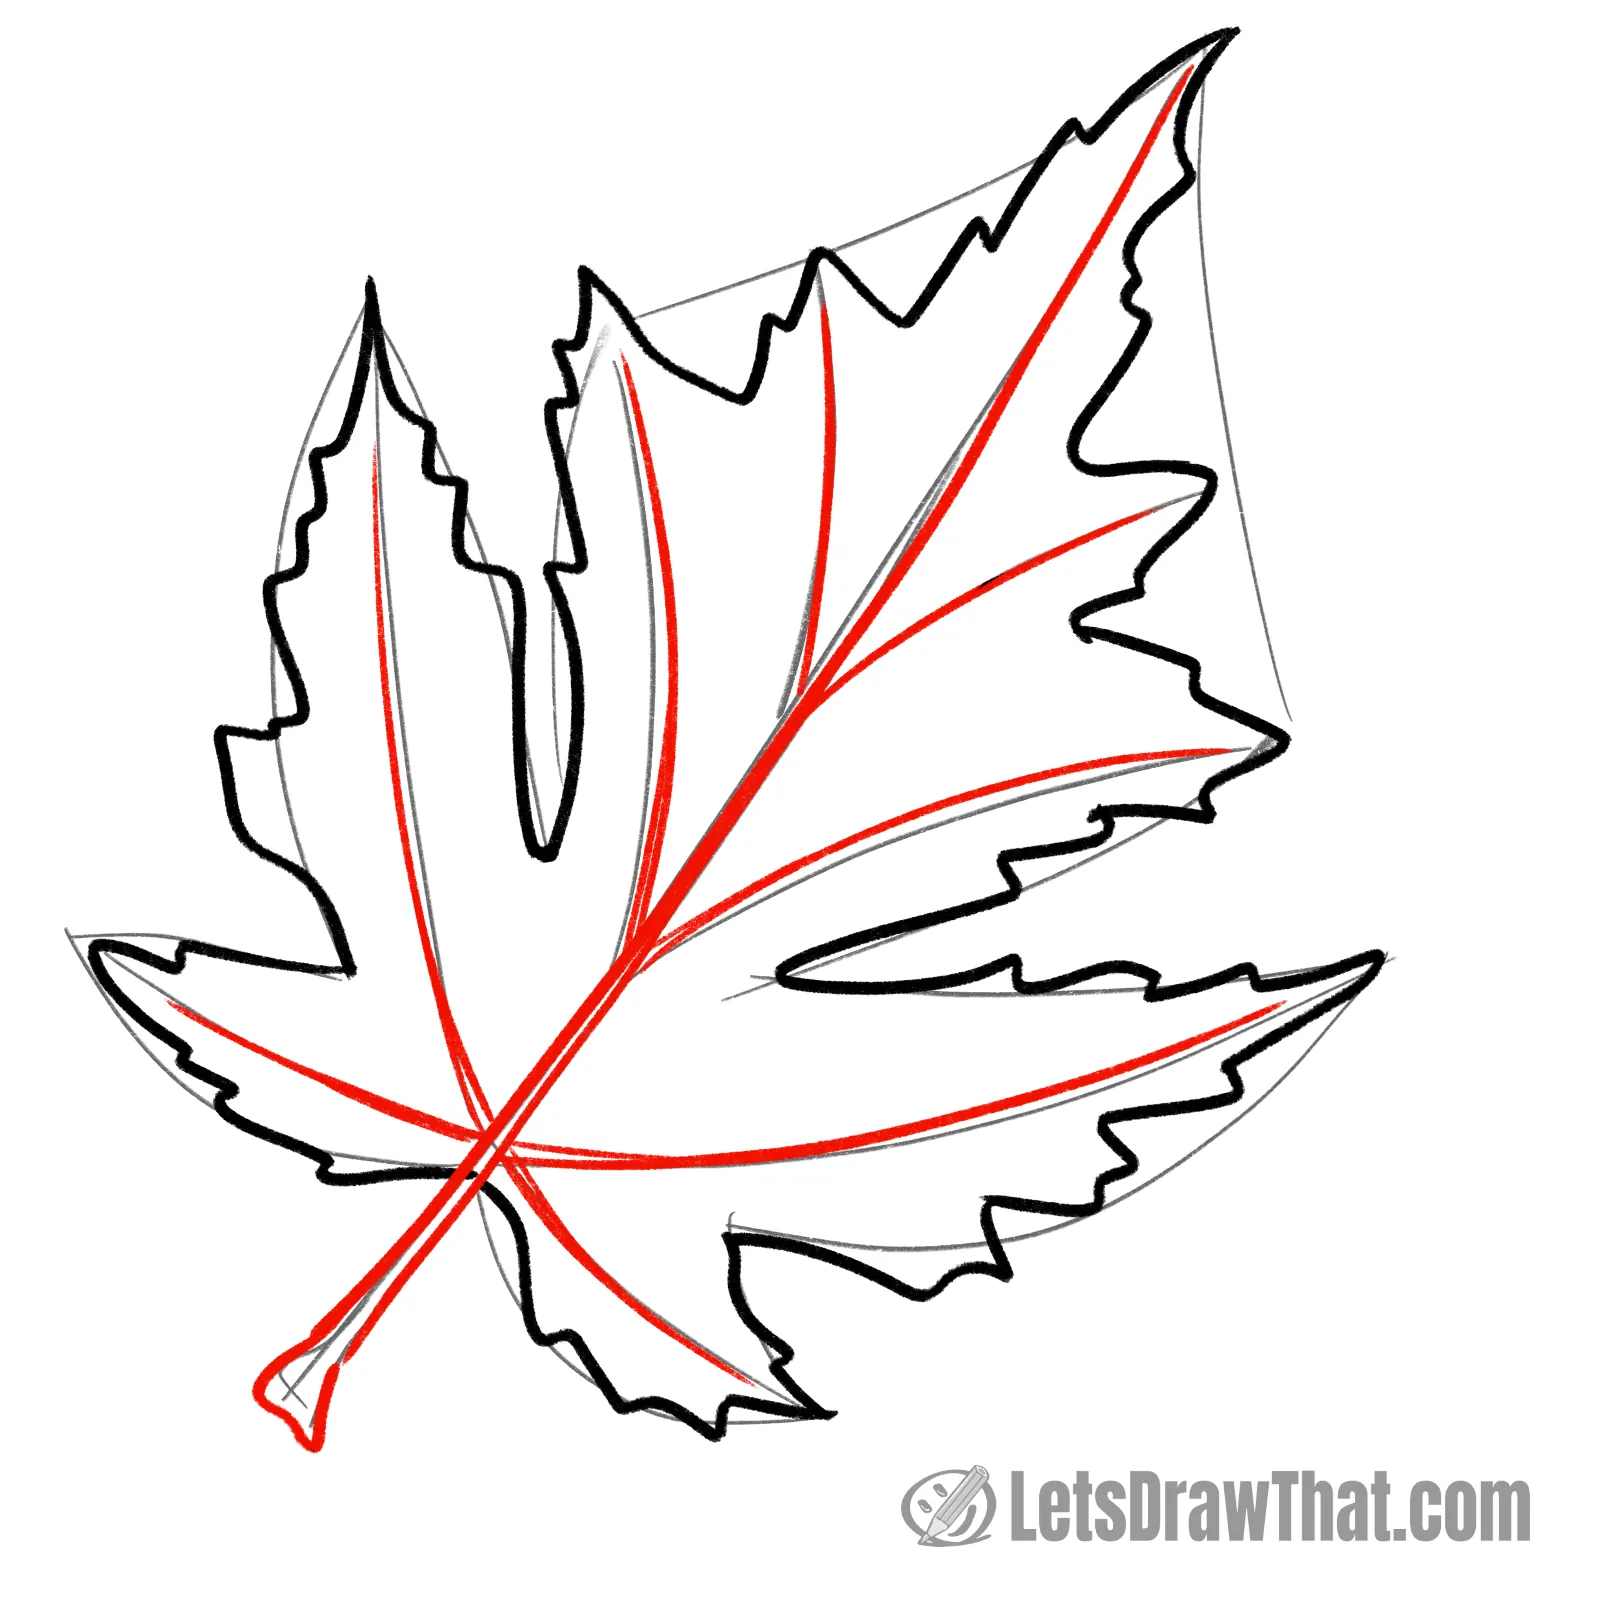
The hard work is done. So, let’s finish the leaf drawing by outlining the sketched midrib and veins and drawing the widened end of the stalk.
Maple autumn leaf drawing finished
Maple autumn leaf drawing outline
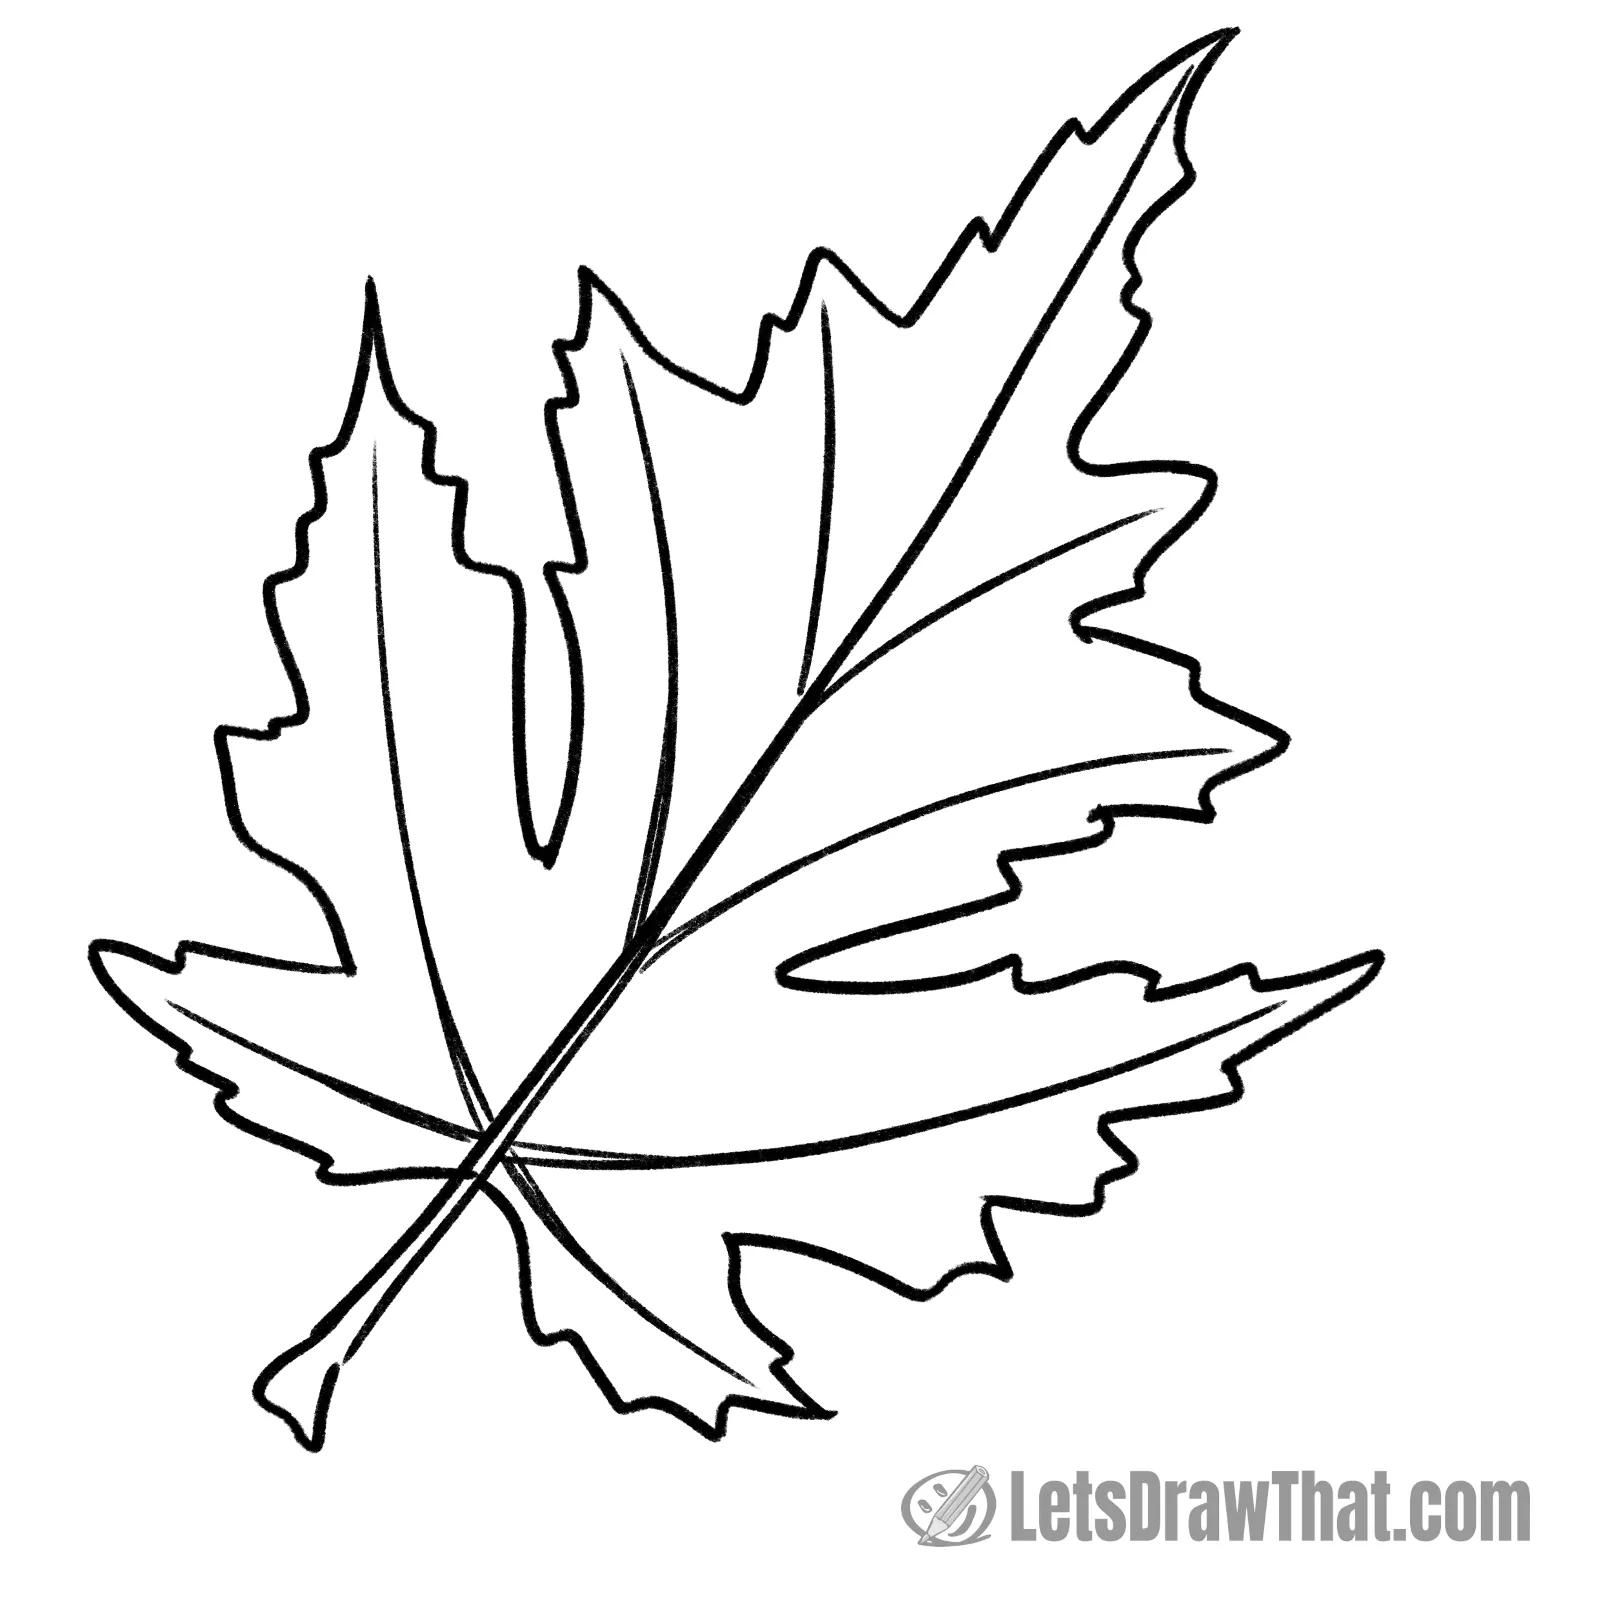
Here is the result of the third part of our “how to draw leaves” tutorial once we have erased the sketch lines.
It turned out to be a funky maple leaf. If yours turned out to be a slightly different shape, do not worry – there is an endless variety in the leaf shapes.
Maple autumn leaf drawing colored-in
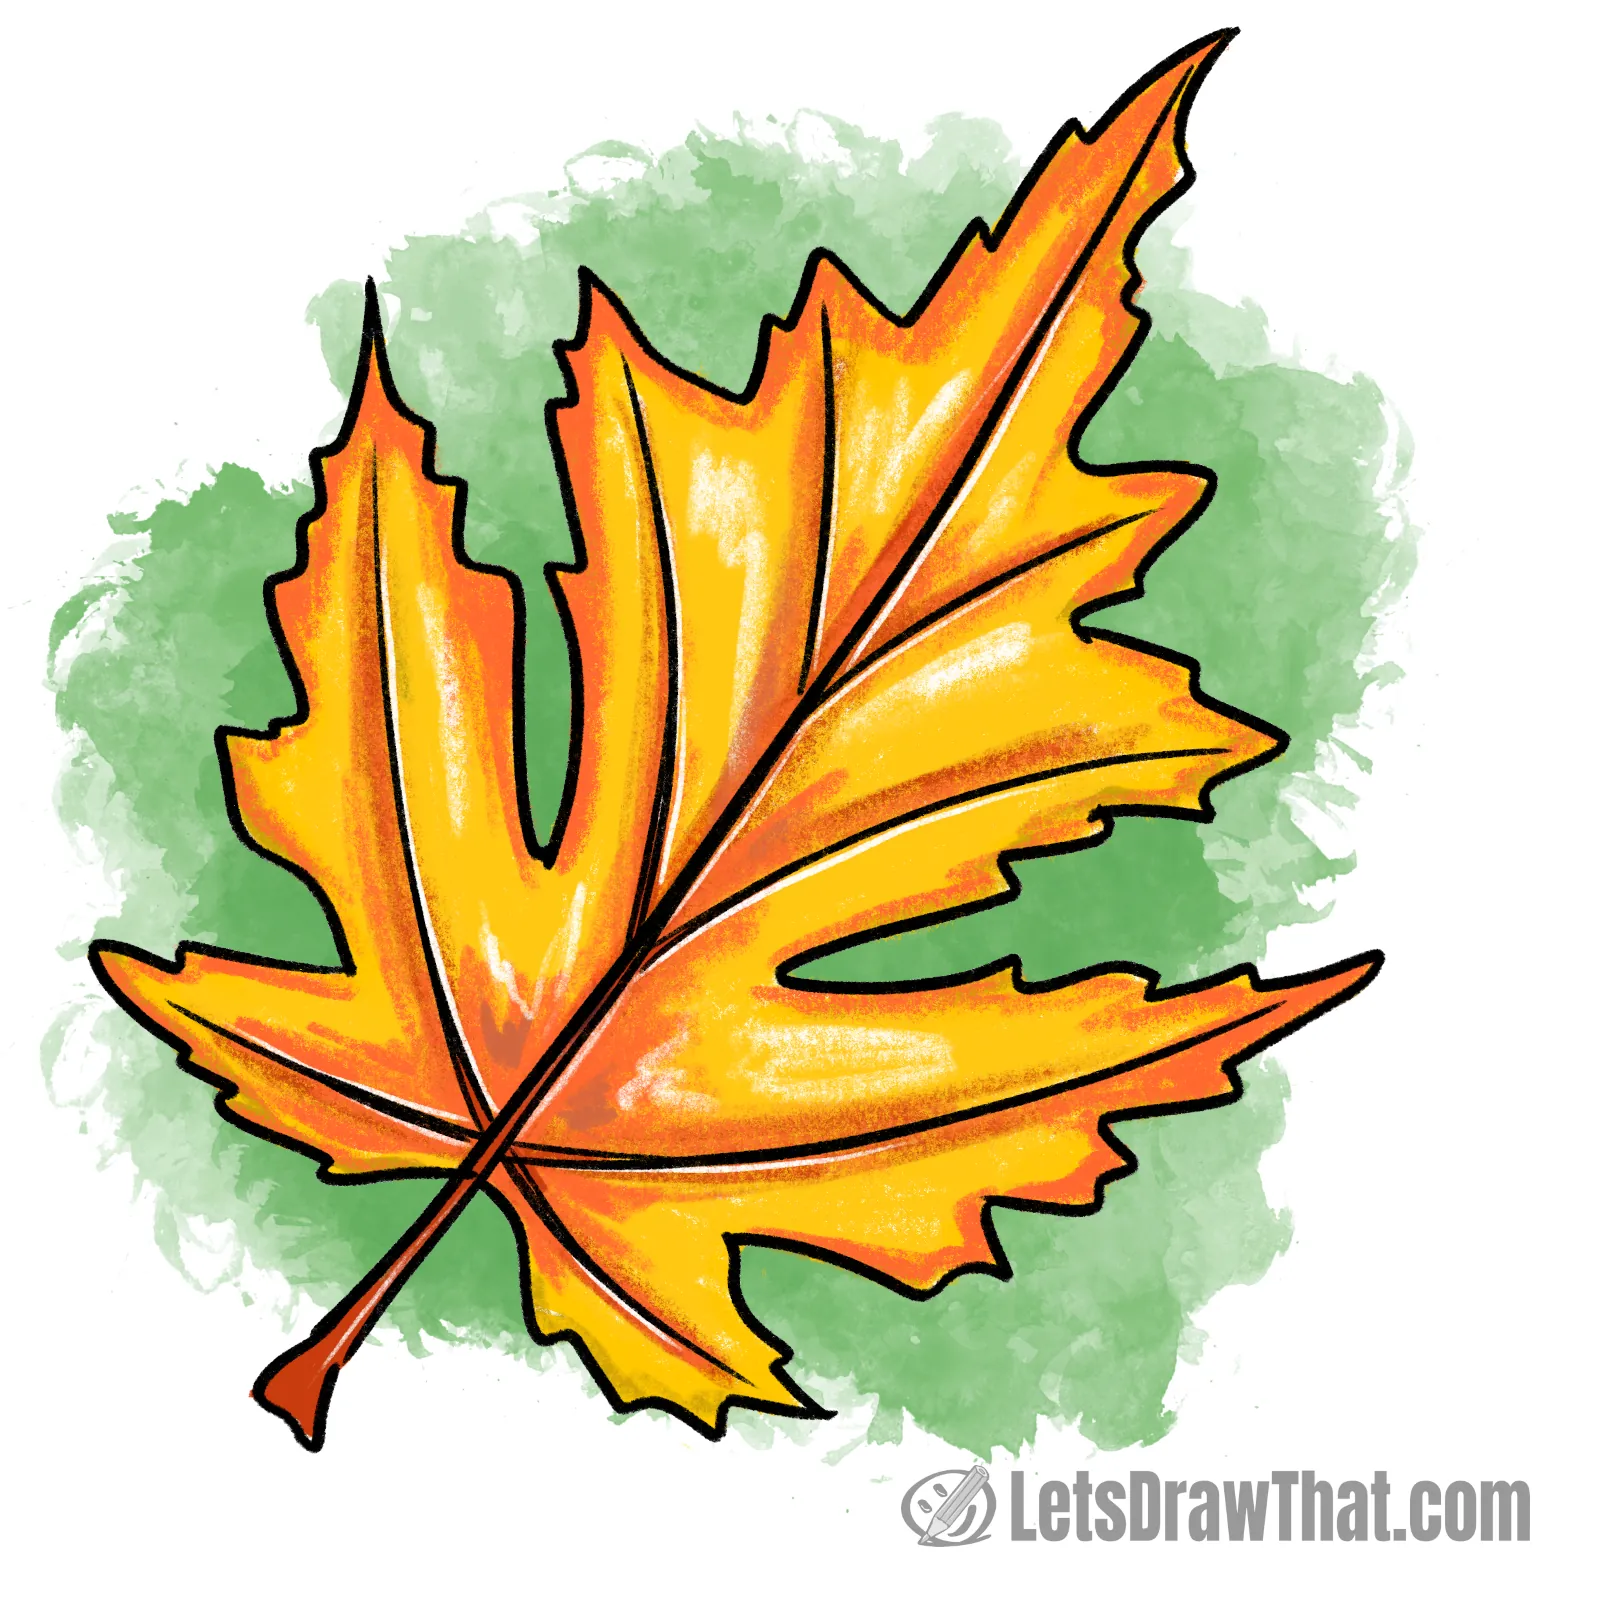
The last step is to color our leaf drawing in some playful autumn colors. Fall maple leaves can be anything from green, yellow, or orange to bright red.
To add a new color to our autumn leaf drawing set, we have chosen yellow for the leaf blade, with some orange along the midrib and veins and along the leaf edges.
The midrib, stalk, and veins are then a darker brown color. Also, notice the usual white highlights.